Blog Widget by LinkWithin
Showing posts with label DIY. Show all posts

Friday, March 13, 2015

The Kitchen, Before and After

Since we've already been living in our house for nearly two years, we already had a list of things we wanted to do to it well before we signed the closing documents. The very top thing on that list was "Remove the kitchen carpet." This seems like an easy enough thing to do, but it quickly turned into the homeowner's version of "If You Give A Mouse A Cookie."  We knew we also wanted to paint, so it only made sense to paint before we had pretty new floors. And if we were going to paint we should retexture the ugly spots first. But if we were going to do that, maybe we should go ahead and add that open shelving? And, well, it just keep snowballing.  This is how we ended up spending every waking non-work minute thinking about or working on the kitchen for 17 days. It was exhausting. We are finally done tho and I could not be happier.

Before I start the pictures, I need to say. I feel like a total badass. This was not a remodel job that we hired someone to do, and it was not the case that my husband did 99% and I handed him tools. I am bragging, but I worked every bit as hard, and I used all the tools. The only thing I completely gave up to him was electrical work, and honestly, I could do that. I feel like I could totally tackle anything now.


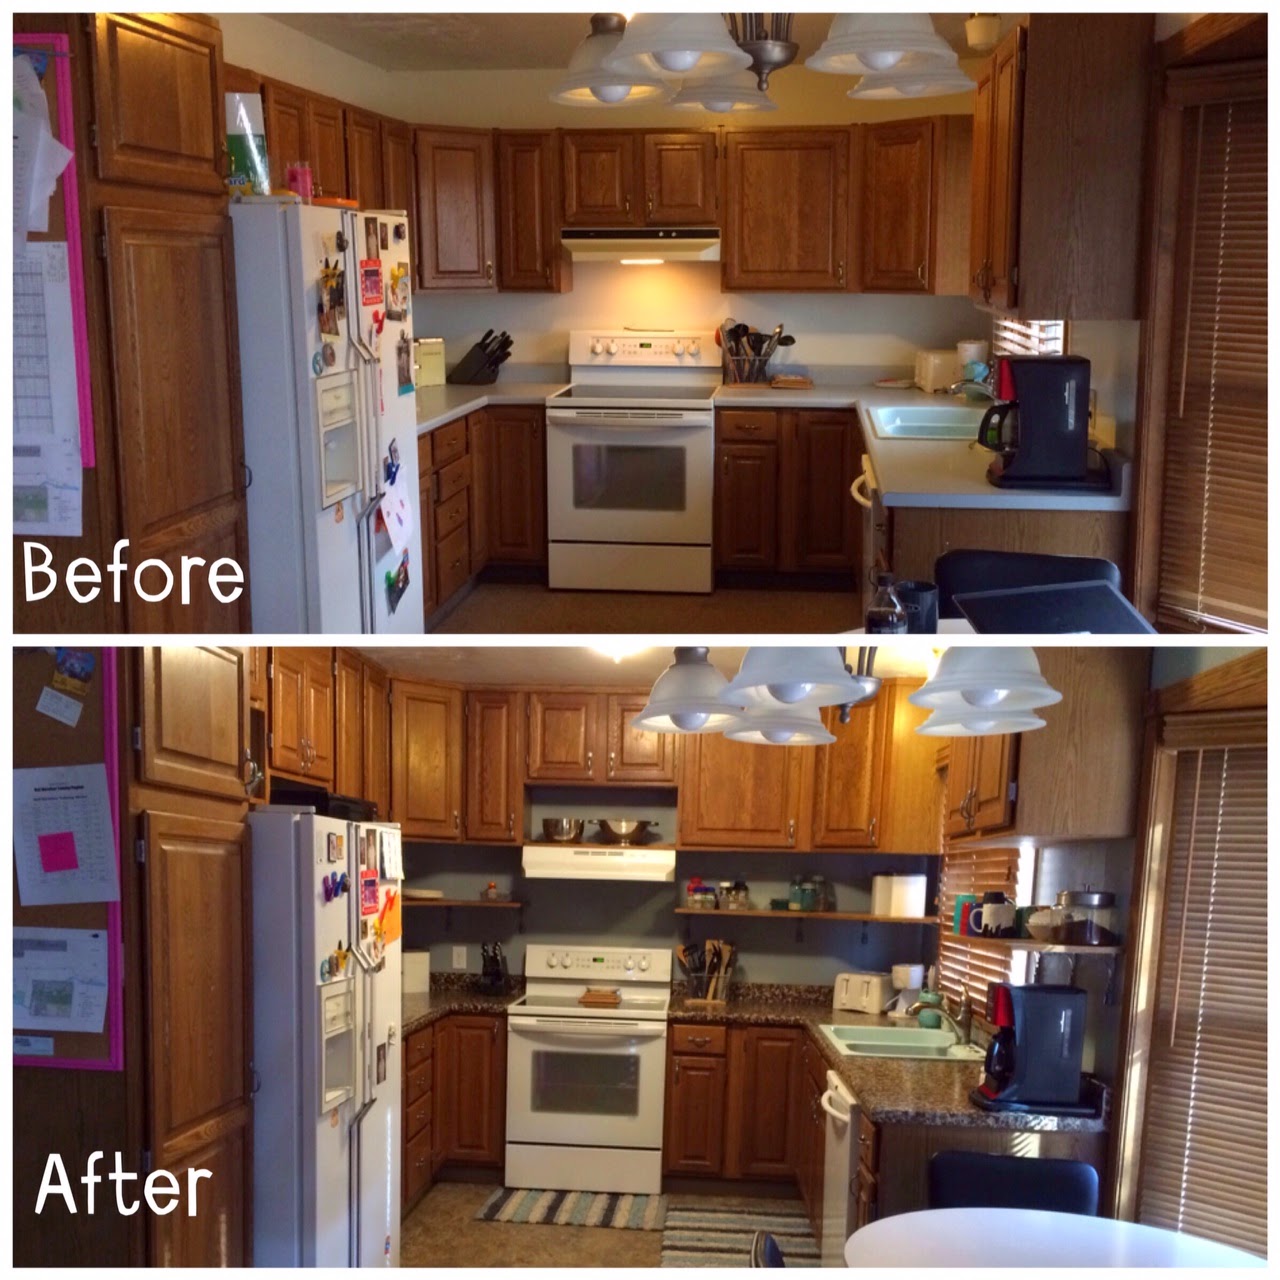
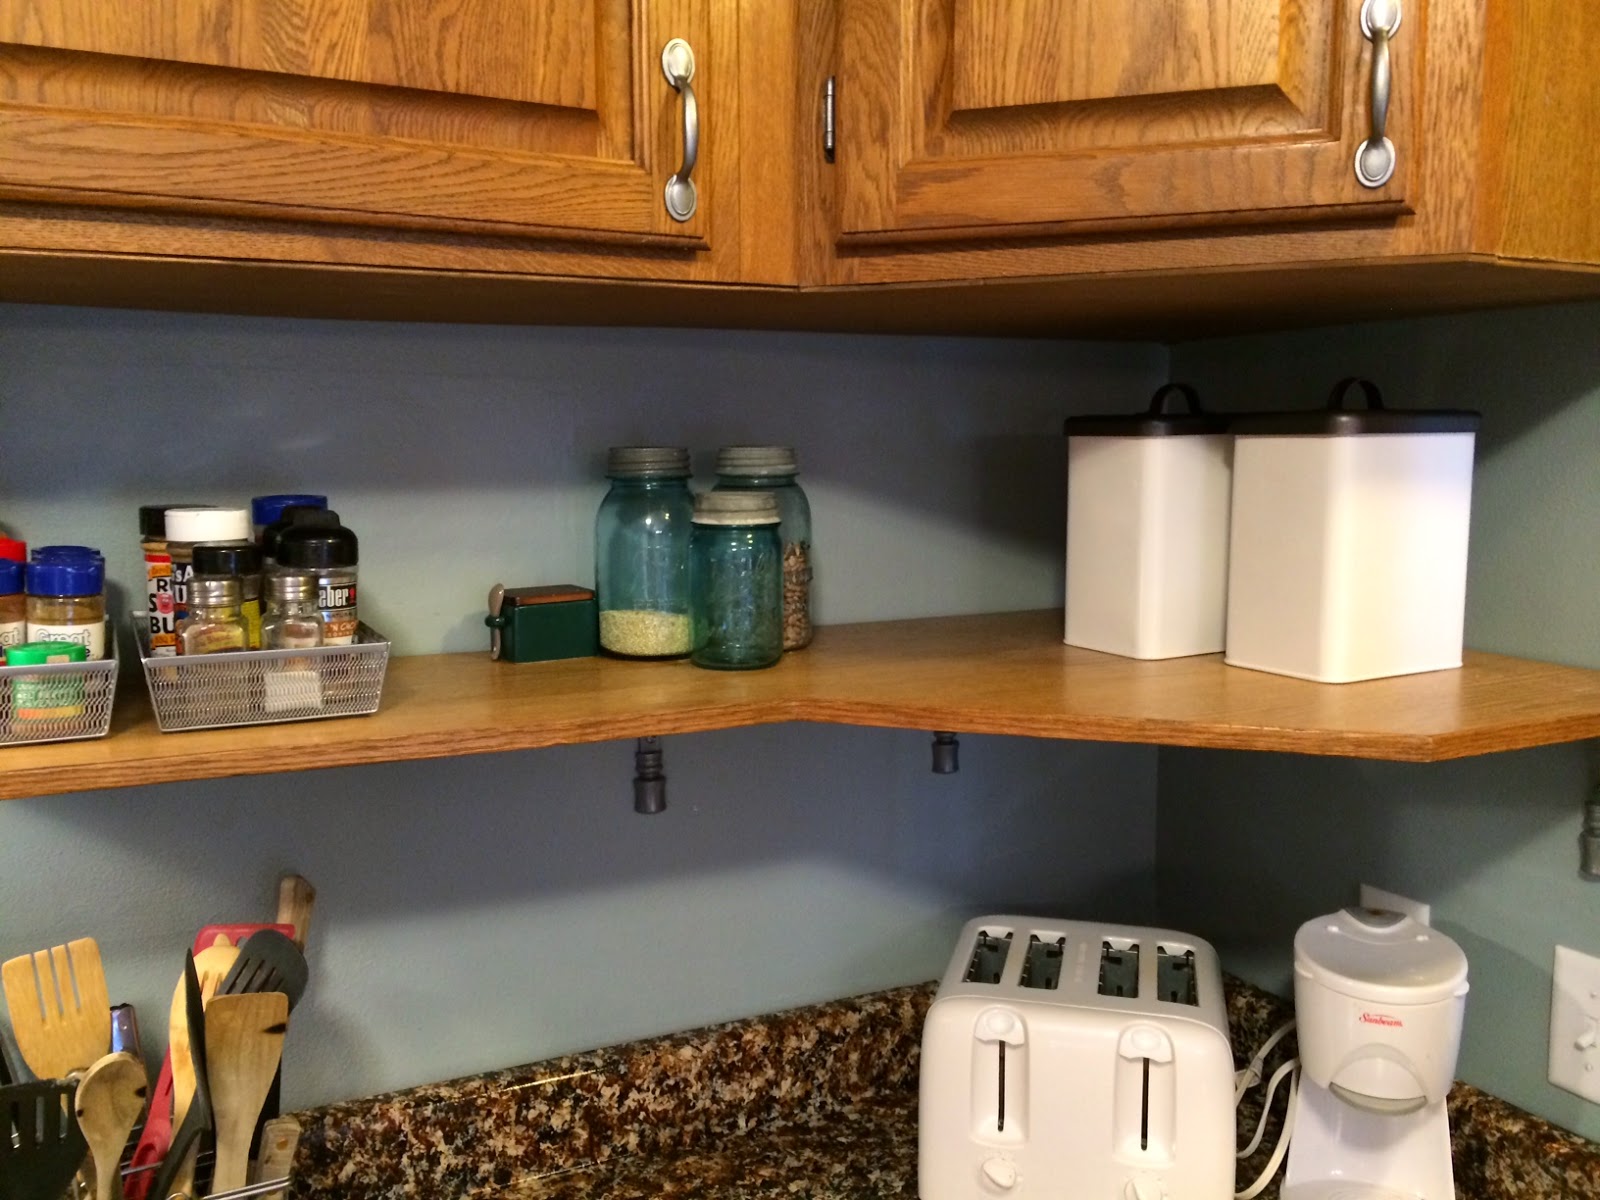
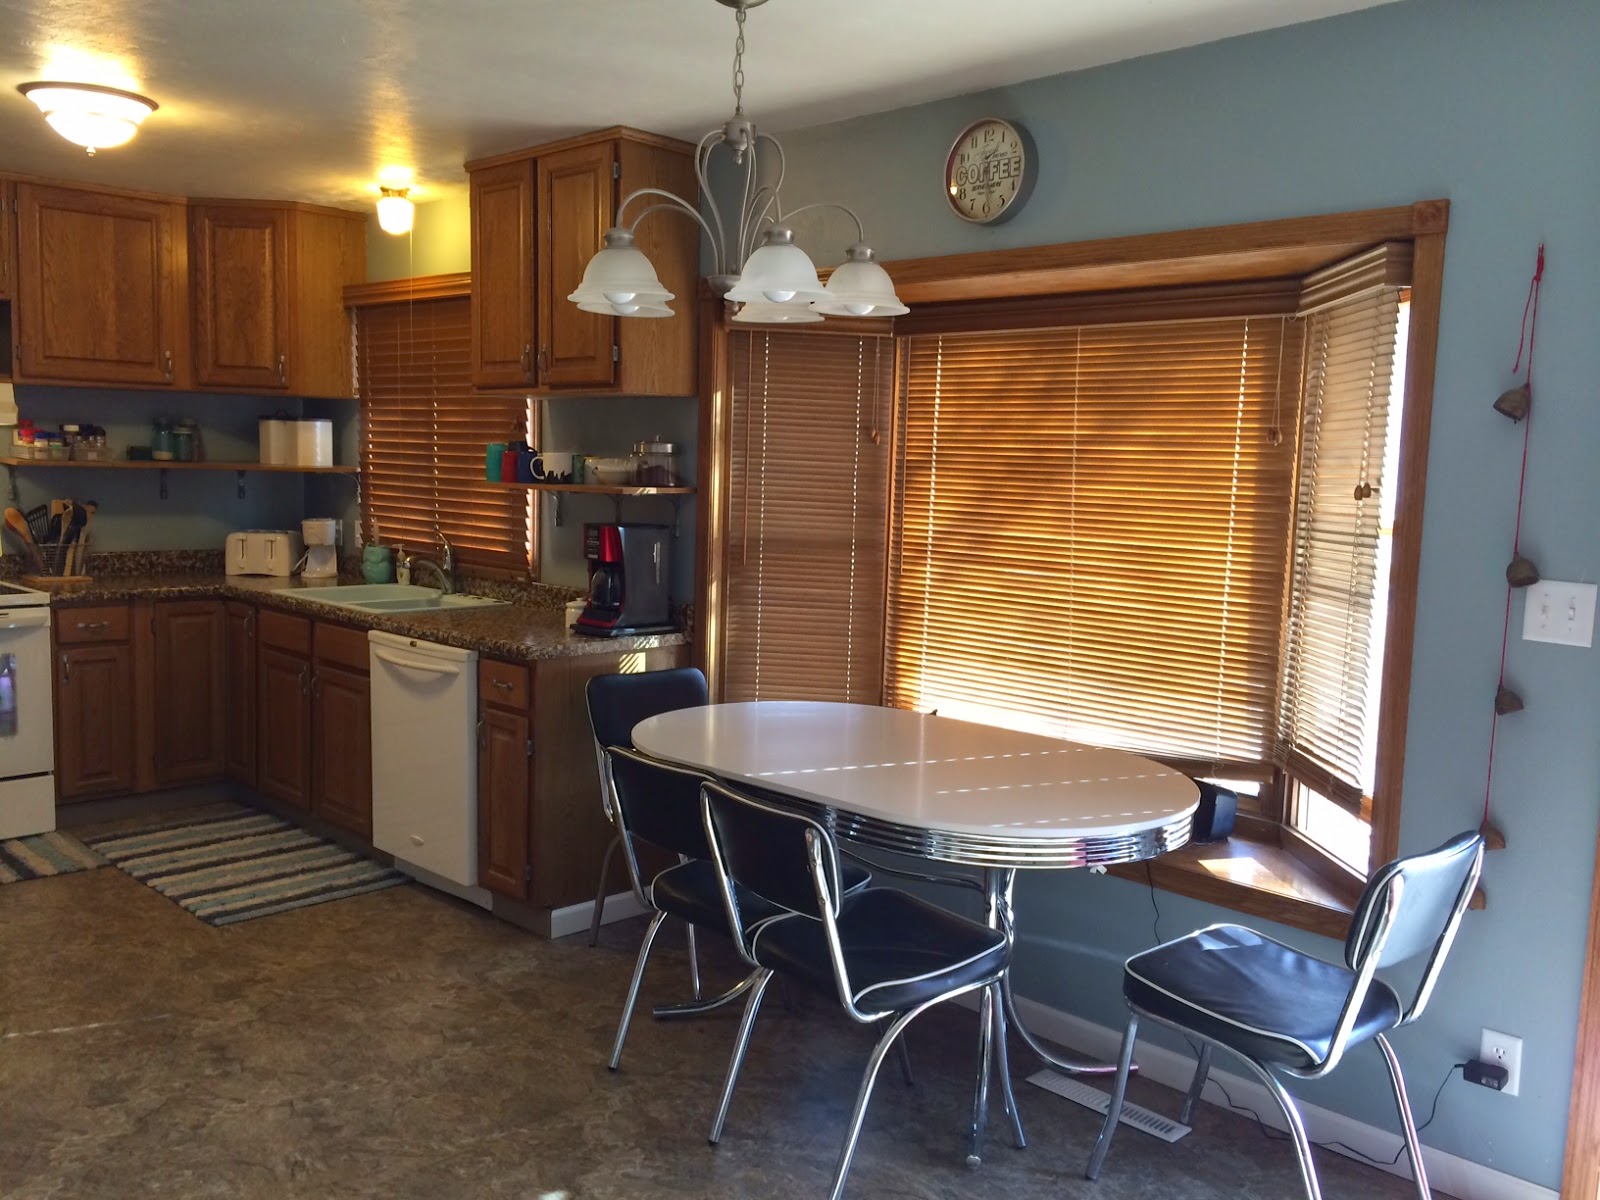
This is the kitchen as whole. It looks a little dark in the after, but the lighting was hard to get even. That multi-fixture near the camera and the angle of the sun made it near impossible. I suppose I could have lightened it. We moved the cabinets up to the ceiling and added crown molding. We painted it a beautiful blue gray (Gunnel from Pratt and Lambert, I can't recommend it enough). We added the open shelving. Replaced the range hood. Built these little shells to cover the open bottoms of the cabinets. Refinished the counters. Replaced the floor.

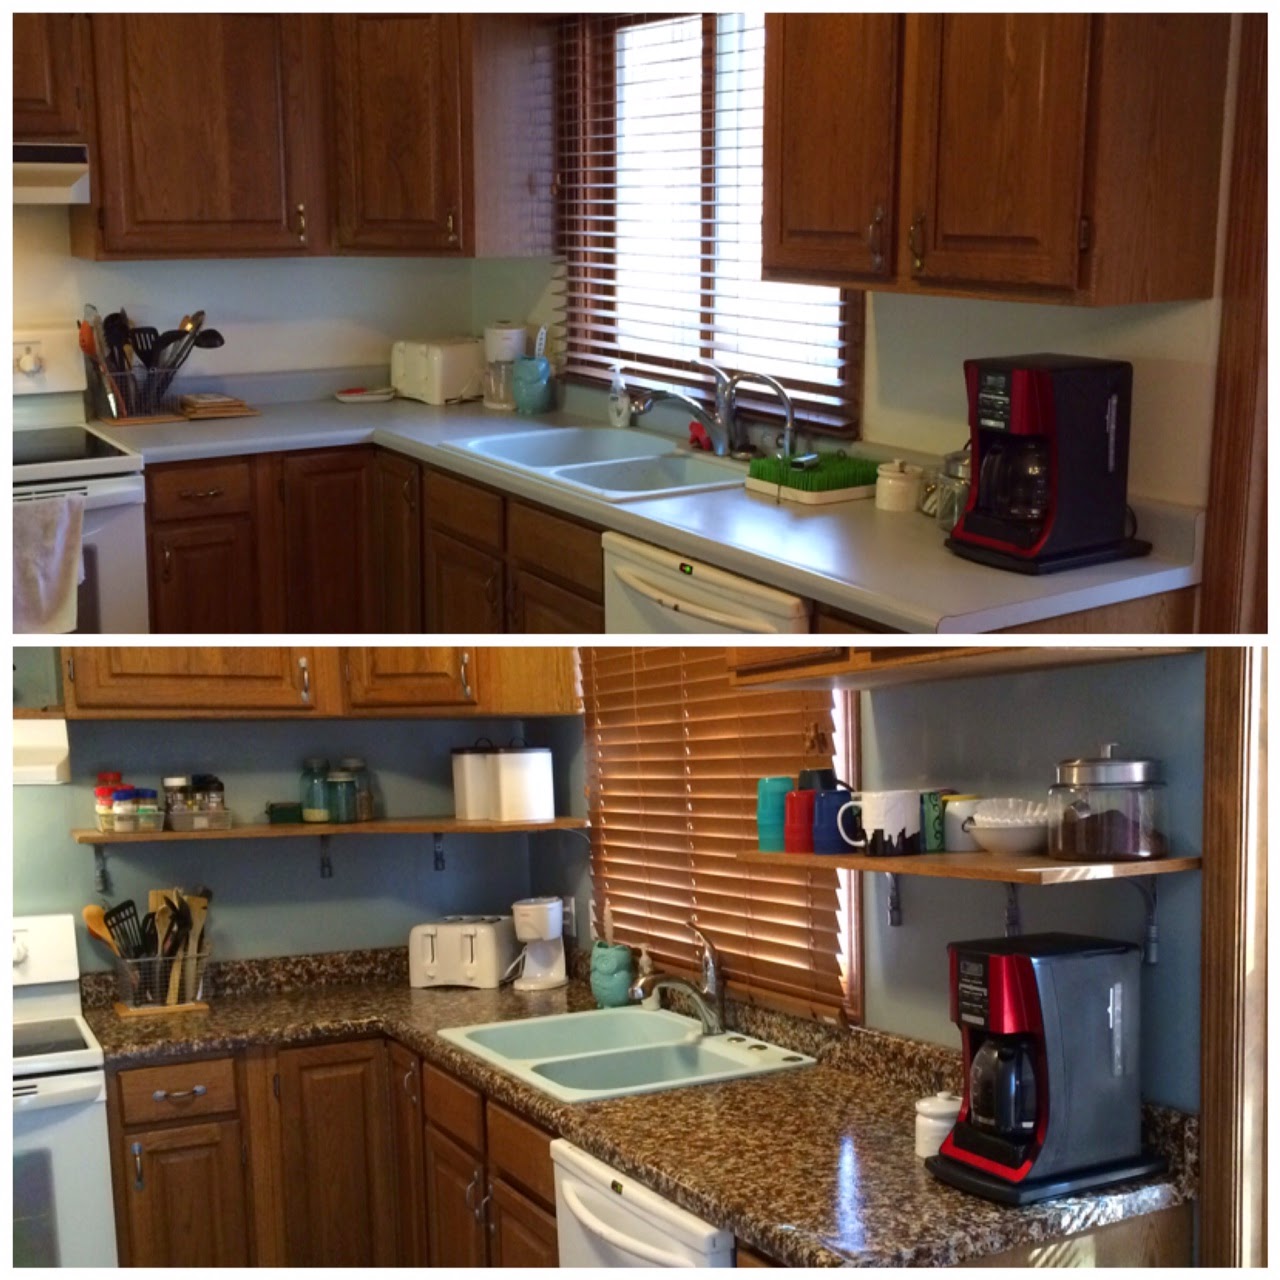
 You can see the new counter tops in this one. We used a kit for this. It's called Giani Granite and we used the Chocolate Brown colorway.  We bought it on Amazon. This was super easy to do, if time consuming. I did all of it so that it would be more consistent, and I think just the "colored" step took me about 6 hours. It's hard to really tell in the the before, but we also removed some extraneous faucets from the sink. And when we put the sink back in? Mike did the physical lifting, but I did all the under sink stuff. I connected the water. I connected the garbage disposal. I R PLUMBR! (Ok, so there was one little leak. Coulda happened to anyone!)
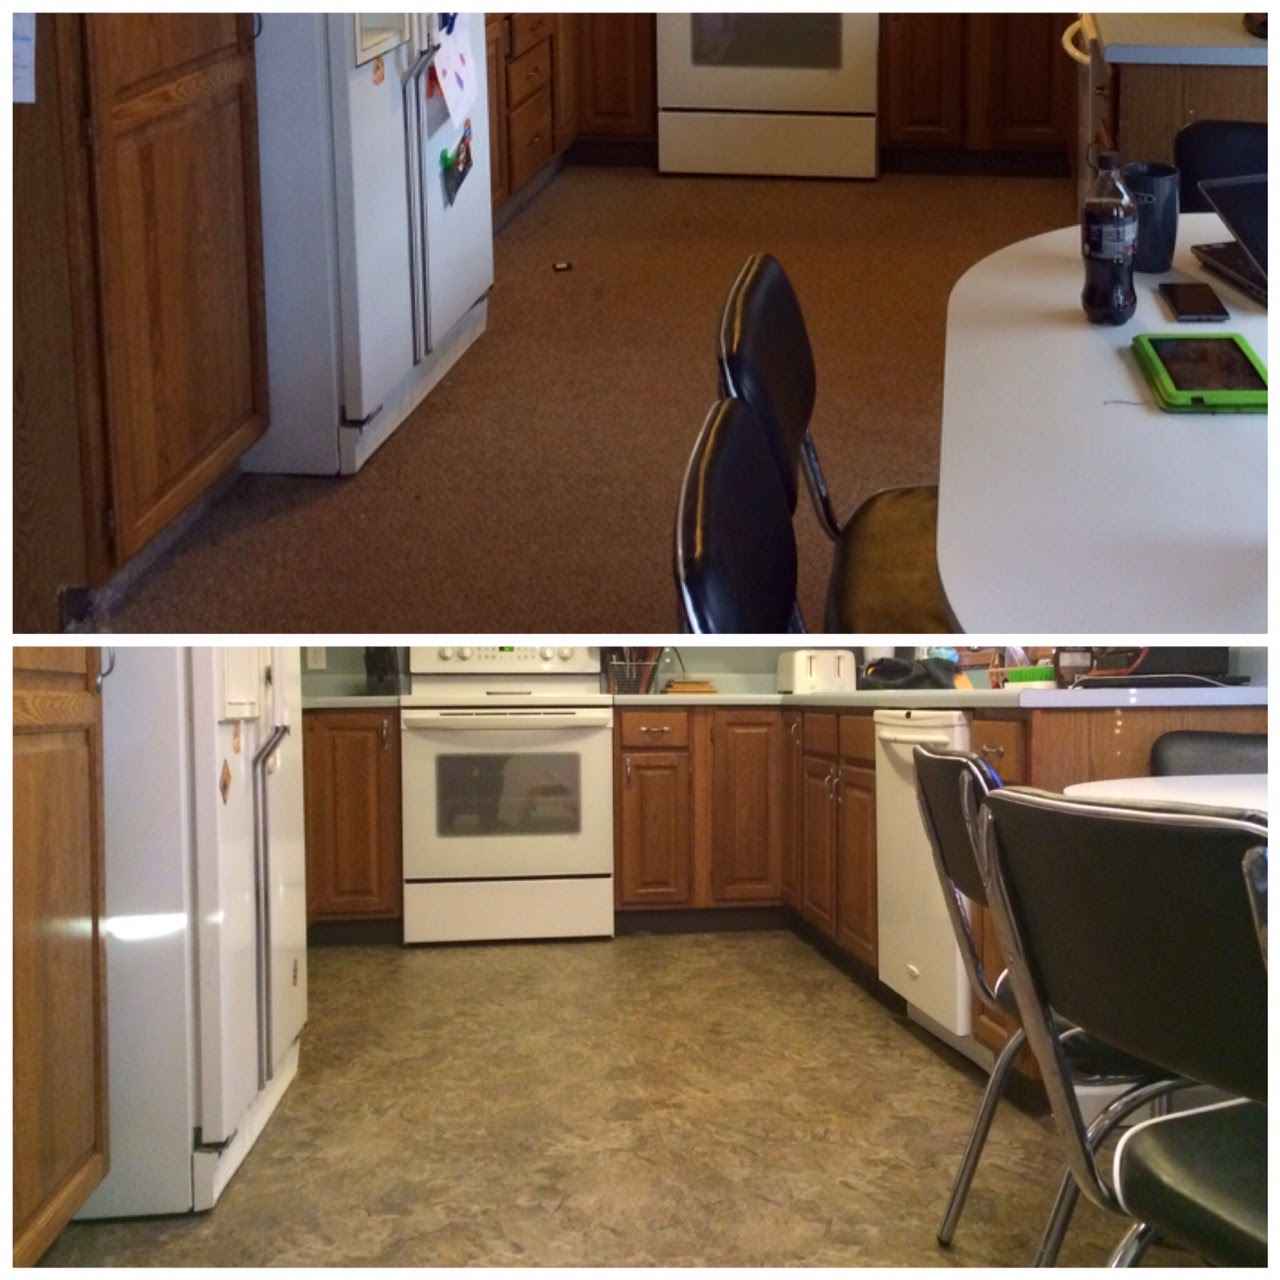
And here's the floor. The beautiful, this is not carpet, floor. We used Congoleum Carefree Floating Vinyl Tile in Mountain Slate. It's much softer to walk on that real slate, and was really easy to put in, once we got the first row in place. (The walls in our house? Not so straight.) My brother-in-law came over to help with this step, because we expected it would be much harder than it was. It did help to have three people doing it. With the three of us working, it took about 6 hours. Guess who did most of the cutting around corners and piecing? Yes, that's right, me. Mostly this involved a utility knife, but I also got to use the jigsaw. Each tile is about 1/4" thick, but they kind of snapped off if you scored it with a knife. I got to use my quilting tools as a square and that was cool.  Lots of fun.
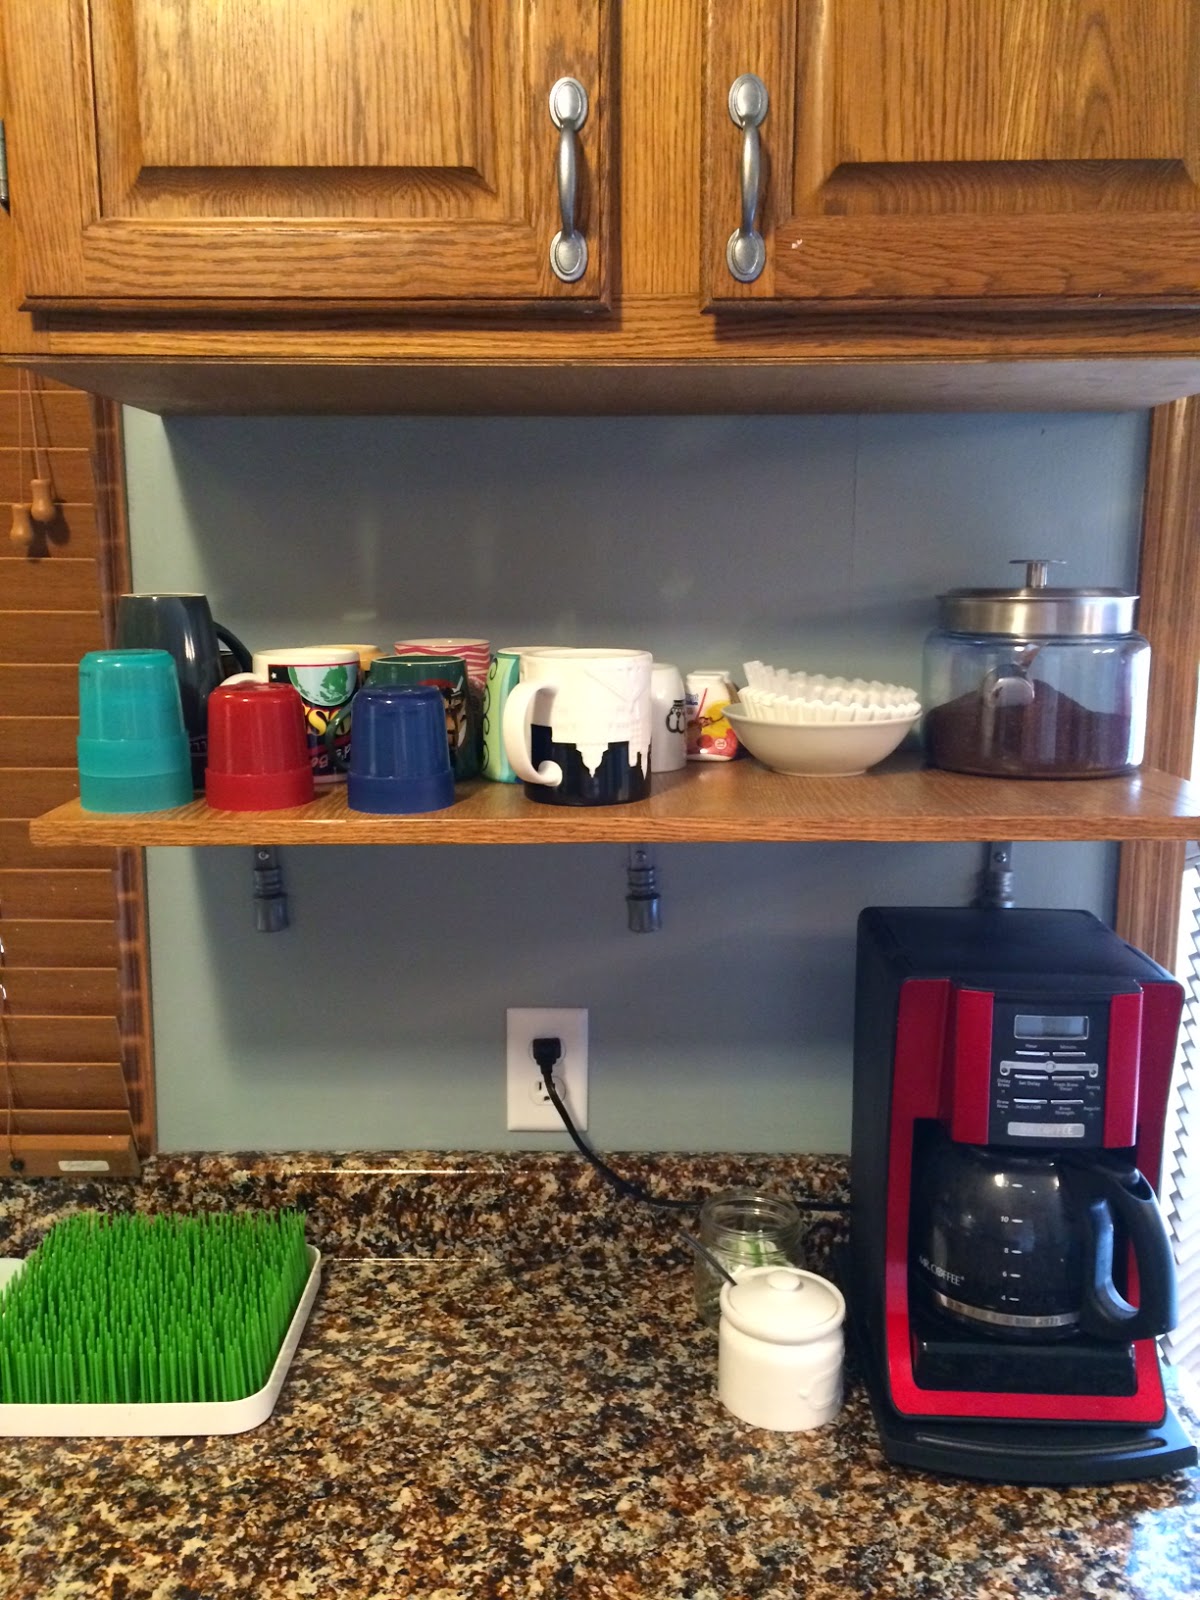
I am so happy to have both my coffee maker AND running water in the kitchen!


I sprayed all the hardware with Rust-Oleum Metallic Spray paint in Dark Steel. It looks terrific. We built the open shelving out of oak plywood and edge banding. Mike cut the boards, I sanded and did the edges and stained them and then Mike installed them.  The brackets are from Menards.

We replaced all the baseboards and toe kick. Mike swapped all the outlets from tan to crisp white. He replaced the door to the closet from a hollow core 1960s wood door to a pretty white two panel door and replaced the outdated broken screen door with one of those fancy ones that the screen rolls up into the top. He changed some of the door and window trim so it all matched the trim on the big window. He did all the miter cuts and thinking, I did all the staining and polyurethane.
I also painted those canisters. I have become one with a paint brush. Or in this case spray can.
 Before (above) and After (Below)
 (But if you couldn't tell which was which we can no longer be friends.)
And now we are taking a couple weeks off to recover... oh wait, no, we aren't. This weekend we start on the back patio...


Sunday, June 02, 2013

The Princess's Bedroom, Before.

I have every intention of living in this house for many years. I may actually never move out of this house. Therefore, even though it's a rental (with the option to buy), I am painting and decorating. The first room I'm going to tackle is The Princess's room, because I've never done a little girl bedroom. I am so excited!  These two pictures from Pinterest are my inspiration, but I have an entire board devoted to her:


(And when I went to get those two pictures, I about died looking at everything I have pinned. So! Cute!)

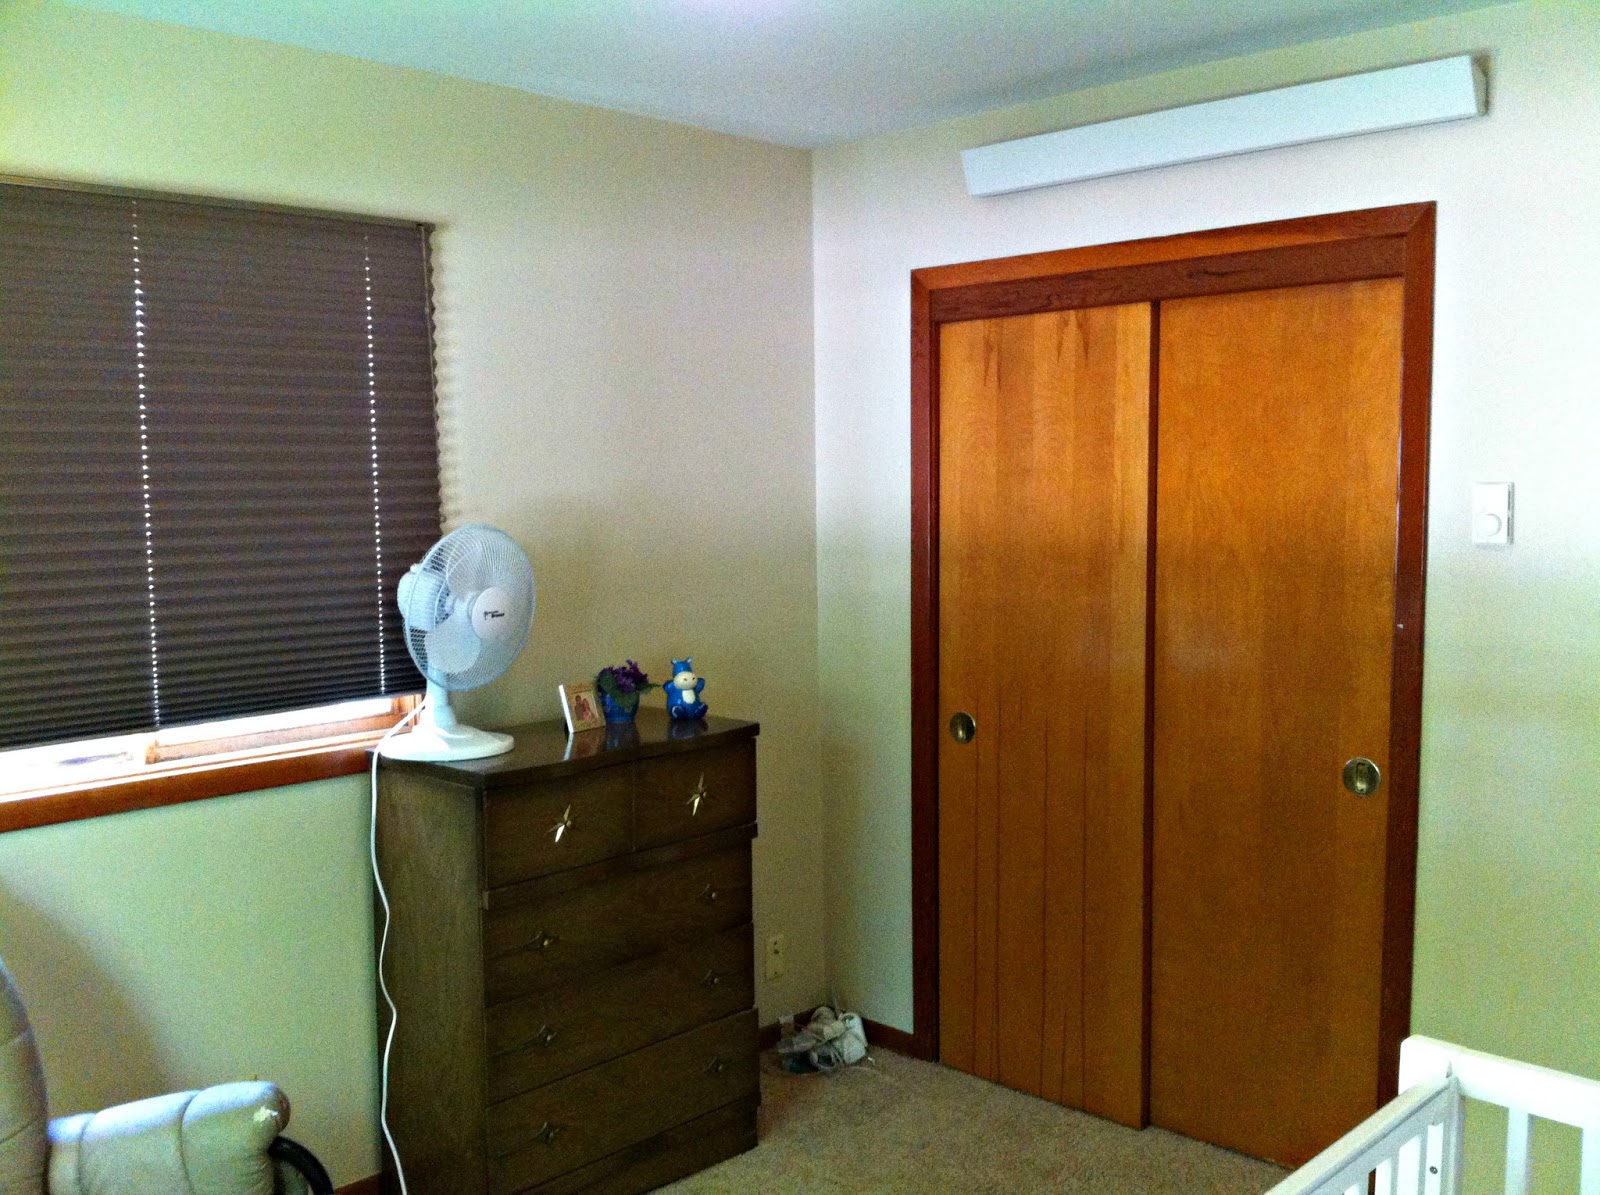
Her room, as it currently is, is a light cream color, but I had planned to paint it gray. The trim in there is wooden tho, so I am wondering if I shouldn't leave it as is.  Here are a couple pictures of the room:

 From the hallway

 From the corner by the closet

 From the corner behind the crib

The crib will convert to a toddler bed and then a full bed, but we are in no hurry as she hasn't shown any signs of being tired of a crib.  I plan to paint the dresser white, and the dresser pulls silver or pewter. I failed to take a picture of them, but they are star shaped, very retro.  I'm having a hard time with the layout of the room as well. The large wall, over the bed, would be best for the display, but you can't really see it from the hallway. Plus, do I want it over the bed? So I am considering moving the bed to be under the window across from the door, or possibly angled in between the windows. Angled won't work when it's a full bed tho, so maybe it would be interesting to fill the space between the windows with the fun stuff?  I just don't know.

I've started to gather some things. I have a blank canvas to do this:


And I'm gathering some pictures and frames and little goodies as well.

 This one is hard to photo, but I have an old ragged hexagon quilt. I am planning to cut out a flower or two and frame them.
 Things I've been saving for her room (Sorry for the sideways picture.)

 A gray and white picture a good friend drew me in high school, and a picture of me from high school.

A page out of a thrifted kid's book of rhymes.

I'd like to do some embroidery hoops and, of course, one day she'll have the pink and gray hexagon quilt. I'm also thinking about a floating wall shelf with some little girly things, for depth and some girly pillows for the glider. Curtains, too, but she'll keep those shades, they are great for blocking light.

What do you guys think? Specifically, about painting the walls gray, and about bed placement?


Thursday, June 07, 2012

How to make a cheap Lego table

Untitled


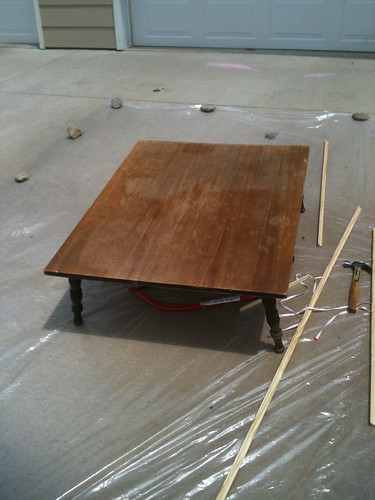
The boys are crazy about Lego. I am also crazy about Lego, but not quite in the same way. I am, like every other parent, sick of picking them up, of moving them off the table, of stepping on them! I have been coveting all the fancy Lego tables I see on Pinterest and Amazon, but it's just not in our budget these days. (Plus, they're all so small!) I've been dreaming up all kinds of solutions, none of which work. I bought a washing machine pan recently, but the boys didn't like the height of the lip and it was too awkward for them to move on their own (you can see the corner of it under the table. It's about 30x30). I've been obsessively checking the local Facebook yard sale group and the thrift store for a cheap table and today we finally scored this beauty:

Thrift store table for fifty cents

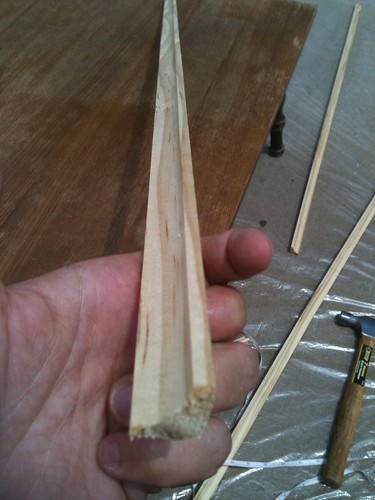
Ok, so it wasn't a lot to look at, but it's big (31x40) and it was only $.50. That's half a dollar. We stopped by our favorite hardware store and picked up some trim pieces and a can of blue spray paint. (I might add, we get a terrific discount at the hardware store, so this was also very cheap.) This is what the trim looks like. Mike tells me this is called "cove" and is used for inside corners and along the ceiling.

Trim pieces

I used a hacksaw to cut it to size. It could be done much better with some kind of electric saw, but I was in a hurry. If you cared, you could make pretty mitered corners. I didn't care. Then the Pirate and I nailed it down on all four sides to make a lip to help contain the Lego.

T helps me nail trim onto the table

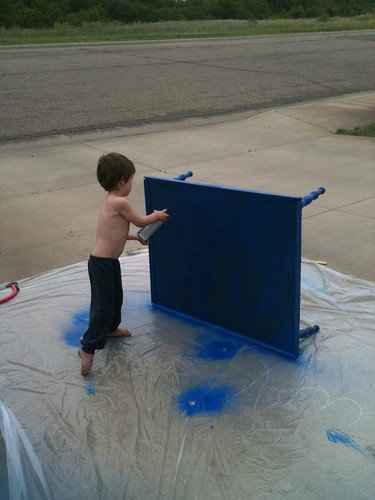
Next we spray painted it a bright blue color. Ideally, we'd put two coats on, but it was very windy and we used the entire can on our first coat. I decided I didn't really care, since it'll be covered in Lego anyway.

N helps spray paint the Lego table

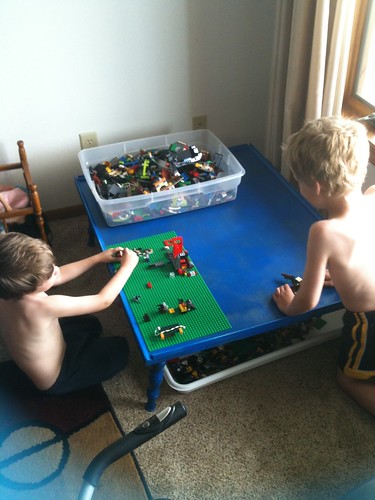
Finally, we ended up with a table that looks like this. The washing machine pan slides neatly underneath. We have two of the big base plates, but the table has room for 9 of them, so I'll be watching for a good deal on Ebay. I won't attach the ones we have until I can do all 9. I don't expect that this will actually completely contain the Lego, but I have hopes that it will at least help.

Homemade Lego table

Our total cost? About $9 and we have most of a box of nails left over. Without the nails, about $5. Your cost would be slightly more, without the crazy hardware store discount, but still way less expensive than a real Lego table.

  © Blogger templates Psi by Ourblogtemplates.com 2008

Back to TOP