Showing posts with label tutorial. Show all posts
Monday, February 25, 2013
A Hexagon Quilt Update (including a how to video!)
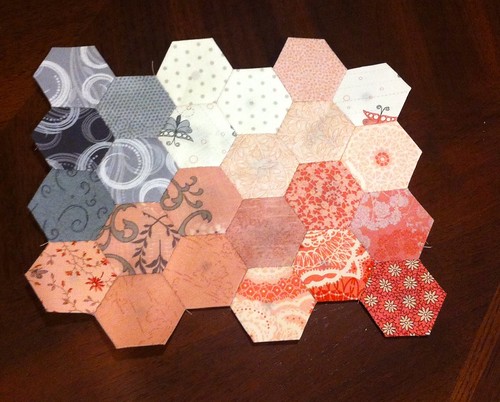
I know, you're all sitting around waiting for me to tell you how the pink and gray hexagon quilt is progressing. My ultimate goal is to make a full sized quilt, which will require 3025* 1" hexagons. I've made 718 so far. Trish kept pestering me, asking when I was going to start sewing them together, and while the real answer is "not until I am very nearly done making them", I couldn't resist making a small patch. I think a lot of people who I've described the quilt to had a really hard time picturing my layout, perhaps this will help? Unfortunately, all it's really done is make me want to sew more together! Like, some of the darker pinks around that bottom right one, and to extend the whites at the top up into cream and back into pale pink and and and... (I can't, because I want to be sure the distribution of the colors is nice and smooth.)
For those of you in the unofficial quilt-a-long, I made a really wobbly, incredibly unprofessional video of how I sew the hexes together. I kept looking at the screen instead of my hands and missing stitches, oops!
In reality, I tend to tilt the hand holding the hexes back and forth quite a bit more, so that I barely have to move the hand holding the needle. I tried to film it like that, but all I ended up with was a really nice video of my table as my hands moved in and out of the frame. I'll give it another shot one day. Maybe.
For those of you NOT in the quilt-a-long, who would like to be, the English paper piecing hexagon tutorial can be found here.
*It really requires just shy of 3000, but my goal is to make 3025 to make up for counting errors.
Tuesday, November 13, 2012
Hexagon Organization and Storage
Since I seem to be leading an informal hexagon quiltalong, I thought you might be interested in seeing how I organize my hexes. Putting them in plastic baggies is too messy, and it hurt my senses to just throw them in a loose pile in a basket. I have shoebox sized rubbermaid boxes for the rainbow quilt when they are sewn together, but what to do with them while they are loose? The pink and gray hexagon quilt won't be sewn into flowers as I go (since it's not flowers!) so I need a way to store them. A lot of people on the internet use these handy clear boxes both for storage and for work in progress.
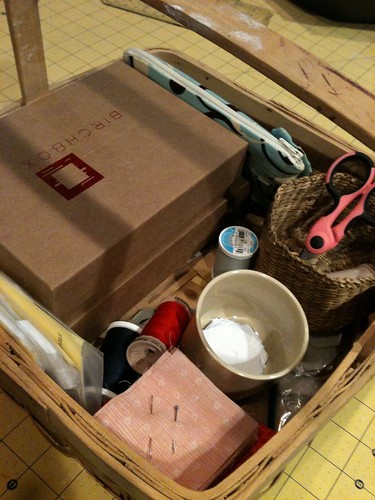
I don't have any of those boxes, and I try really hard not to spend money on stuff that I can make do without. Since I have more than one hex project going, I need a way to keep them apart as well. If I'm working on hexes at home I use this largish basket to hold all my stuff. It has a little bowl for papers, scissors, thread, needles, and my travel pouch (when it's not traveling.)
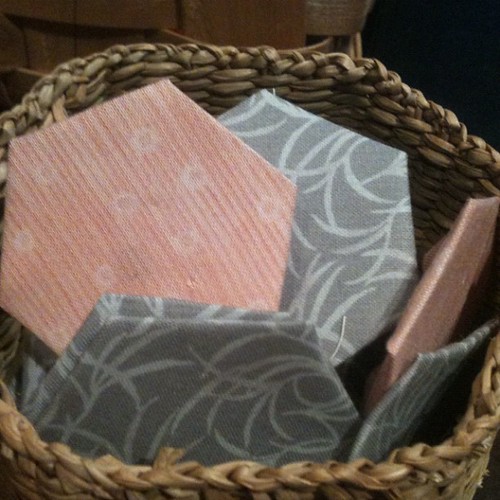
I throw my completed into this little hexagon shaped basket before I iron them.
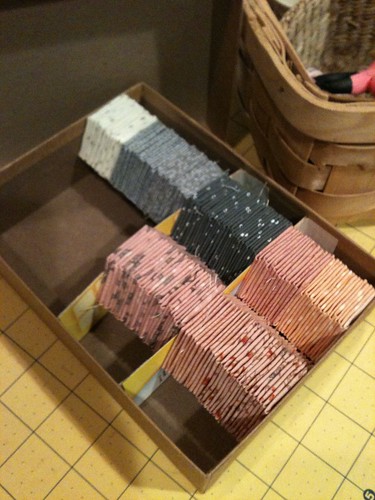
For the completed hexes, I wanted them to be kept neatly contained without purchasing anything. I have been saving the cute little cardboard boxes from Birchbox and they turn out to be the perfect size. I used the cardboard from a cereal box and carefully cut dividers, and then taped them into place. These work perfectly!
(Fun challenge, how many hexes do you think are in that box? Answer in the comments.)
They are identical on the outside, so I need to find a cute way to designate each one at a glance. (Yes, I could just write on them, but that's no fun.) The problem is that I am quickly outgrowing my little birchboxes and I'm going to need to find a larger solution. I think this picture is stunning, I wonder where one finds that tray?
There are a lot of different way of storing them, and looking through flickr and pinterest will certainly give you ideas. I'd love to see how you are storing yours, both in progress and as they wait to be combined into a quilt. Feel free to write your own post, or just chat about it on twitter (#hexchat).
If you're new here and are interested in joining the (very very informal!) quiltalong, you can jump in at any time. The tutorial for basting the hexagons can be found here. Our flickr group can be found here. As soon as I have a chance to write it up I'll show you how I join them into flowers (though you can also find this information by googling!)
I don't have any of those boxes, and I try really hard not to spend money on stuff that I can make do without. Since I have more than one hex project going, I need a way to keep them apart as well. If I'm working on hexes at home I use this largish basket to hold all my stuff. It has a little bowl for papers, scissors, thread, needles, and my travel pouch (when it's not traveling.)
I throw my completed into this little hexagon shaped basket before I iron them.
For the completed hexes, I wanted them to be kept neatly contained without purchasing anything. I have been saving the cute little cardboard boxes from Birchbox and they turn out to be the perfect size. I used the cardboard from a cereal box and carefully cut dividers, and then taped them into place. These work perfectly!
(Fun challenge, how many hexes do you think are in that box? Answer in the comments.)
They are identical on the outside, so I need to find a cute way to designate each one at a glance. (Yes, I could just write on them, but that's no fun.) The problem is that I am quickly outgrowing my little birchboxes and I'm going to need to find a larger solution. I think this picture is stunning, I wonder where one finds that tray?
There are a lot of different way of storing them, and looking through flickr and pinterest will certainly give you ideas. I'd love to see how you are storing yours, both in progress and as they wait to be combined into a quilt. Feel free to write your own post, or just chat about it on twitter (#hexchat).
If you're new here and are interested in joining the (very very informal!) quiltalong, you can jump in at any time. The tutorial for basting the hexagons can be found here. Our flickr group can be found here. As soon as I have a chance to write it up I'll show you how I join them into flowers (though you can also find this information by googling!)
Tuesday, November 06, 2012
Paper pieced hexagon basting tutorial
It is true that you can find tons of tutorials for paper piecing online, but sometimes you want someone you know to show you how they do things. I make no claims that this is the best way, or the best tutorial, or the correct way (tho I do believe there is no correct way to do much of anything in sewing- except maybe thread your machine...) I am madly addicted to the little things, because you can literally pick one up and do ONE. You can do them while you are watching tv or while having coffee with friends. They are so easily portable. I love them.
Here's what you'll need:
Needles
Thread (it doesn't matter what type but I use hand quilting thread because it's stiffer and tangles less without having to do extra steps like run it through a dryer sheet.)
Small pins
Fabric
Printer paper, card stock or freezer paper, your choice.
Scissors
A printer
A hole punch (optional)
My instructions are for a 1" paper pieced hexagon. A hexagon is measured along one side, not across the middle. If you are using a different sized hexagon, your fabric measurements will be different. For a 1" hexagon you will need a fabric square that is 2.5" x 2.5". You can find measurements for other sizes here.
Step 1: Make your paper templates. Print your hexagons onto your paper of choice. Freezer paper is harder to do, but it will iron onto your fabric, which is useful for fussy cut hexes. Measure one side of the hex to be sure your printer didn't resize anything for you, because if it did, you will be very angry later. Carefully cut out your hexes. I like to use this template that Megan showed me, because they are not nested and you don't have to be quite as careful. I find it goes faster even if I'm cutting twice as many edges. Cut out way more than you think you'll use, because you'll get addicted. I like to use a hole punch to punch a hole in the center of each of my paper pieces, because it makes them easier to remove later. This is optional. If you are too lazy or pressed for time to do this, you can order precut papers from www.paperpieces.com. I ordered a small batch to test- they are made of card stock and do not have a hole. They are lovely to work with and the card stock does make making hexes easier, but it is not necessary. I'm not showing you a picture of how to cut paper (that's what kindergarten was for), but here's what they look like when you're done:
Step 2: Cut your fabric into 2.5" squares. You don't need to be exactly precise, so if you have a scrap that is slightly wonky, it'll probably work. You just need to make sure you have about 1/4" margin all the way around. You can fussy cut them, or just whack through a bunch of fabric. I find it more relaxing to not be fussy cut, but it's awfully cute to do a little bird on a hex.
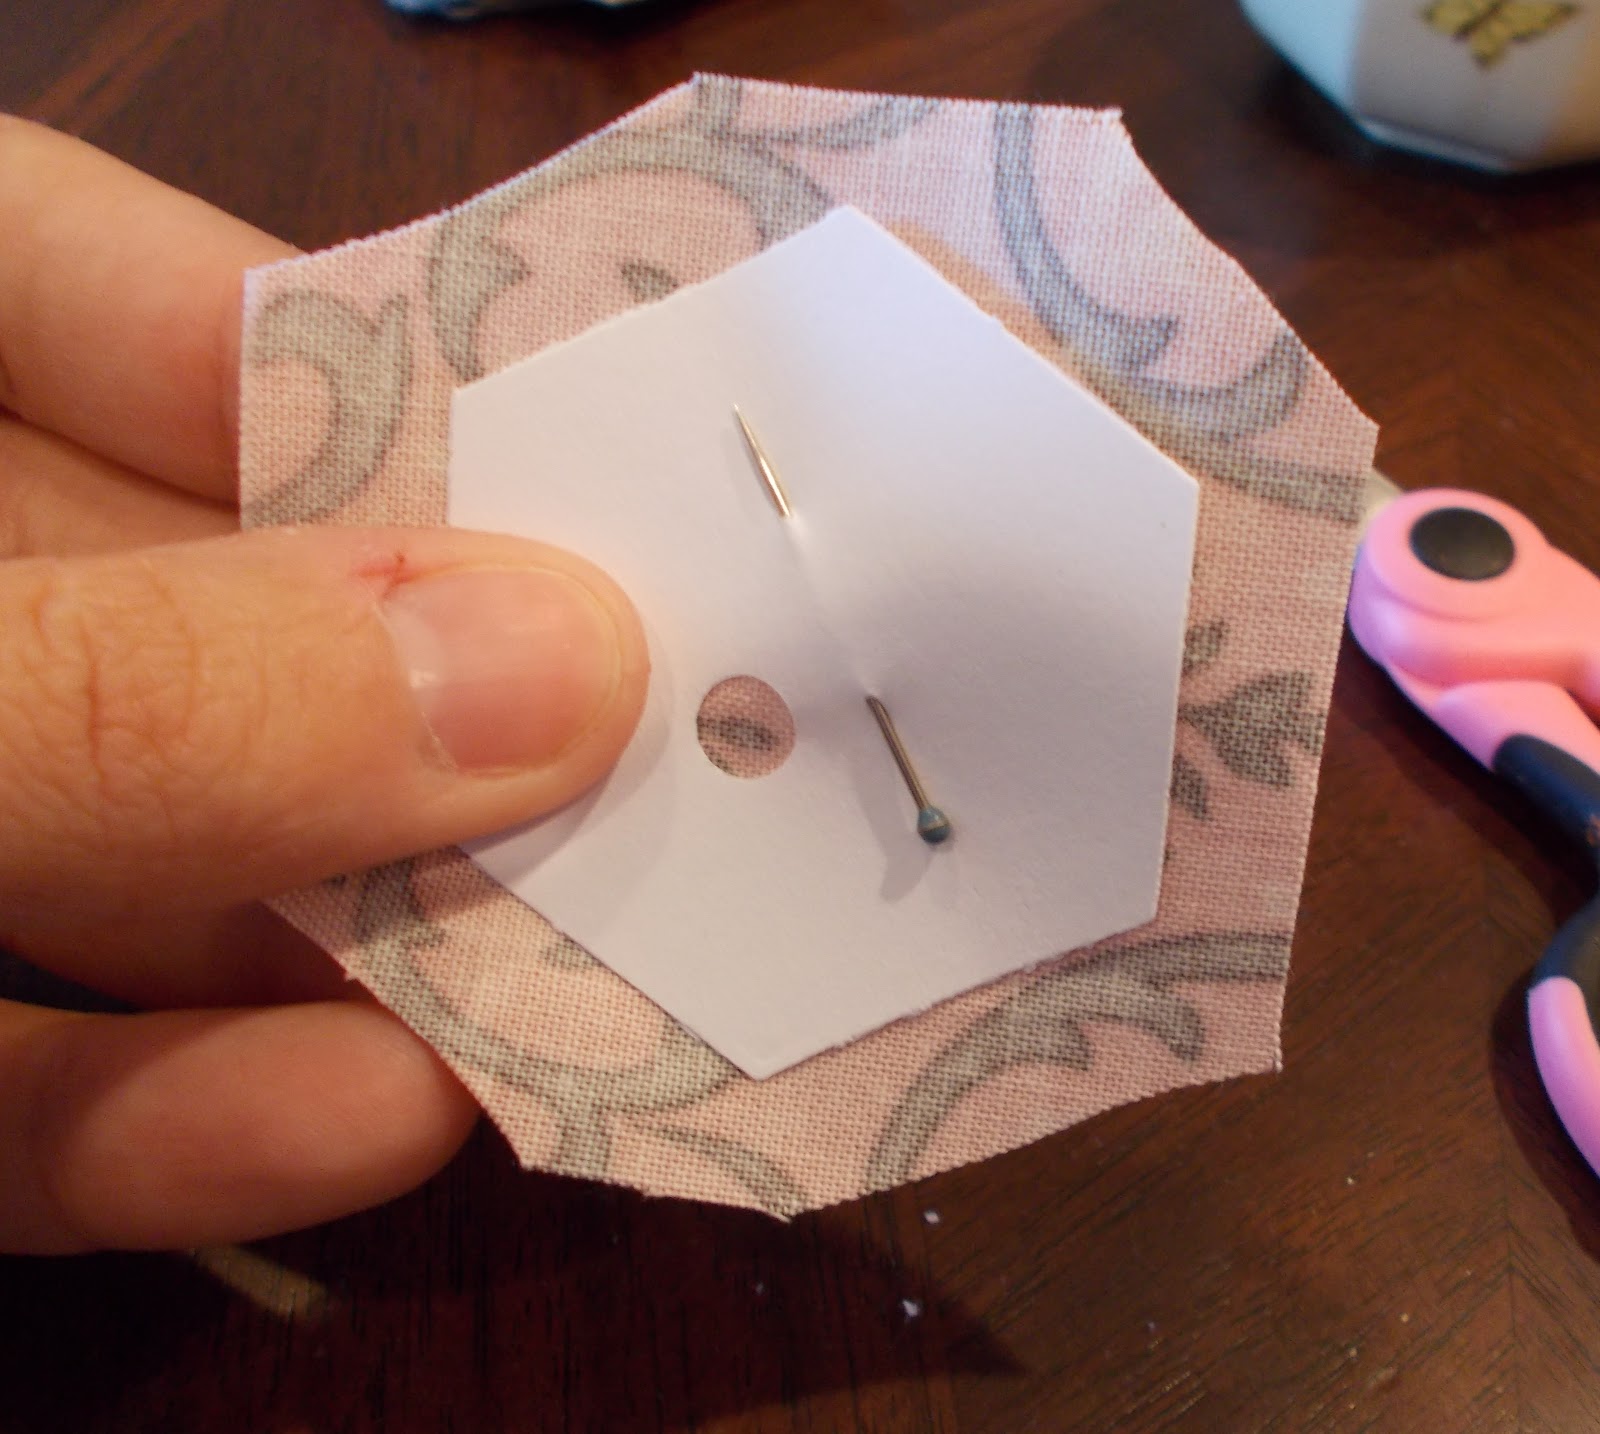
Step 3: Center a paper piece on the WRONG side of your fabric. Some people can pinch it firmly enough to not need to pin it. Some people like to use one pin, some use two. Some people use a couple basting stitches to hold it still. If you use freezer paper you will iron it on. I like to use one tiny pin, and then pinch it. If you find it's still sliding, add a second pin in the shape of an X. You will have little fabric corners hanging off. You can trim those, or not, it's up to you. If you do, leave a 1/4" seam allowance. From what I can tell, this will matter more on hand quilted quilts in the end.
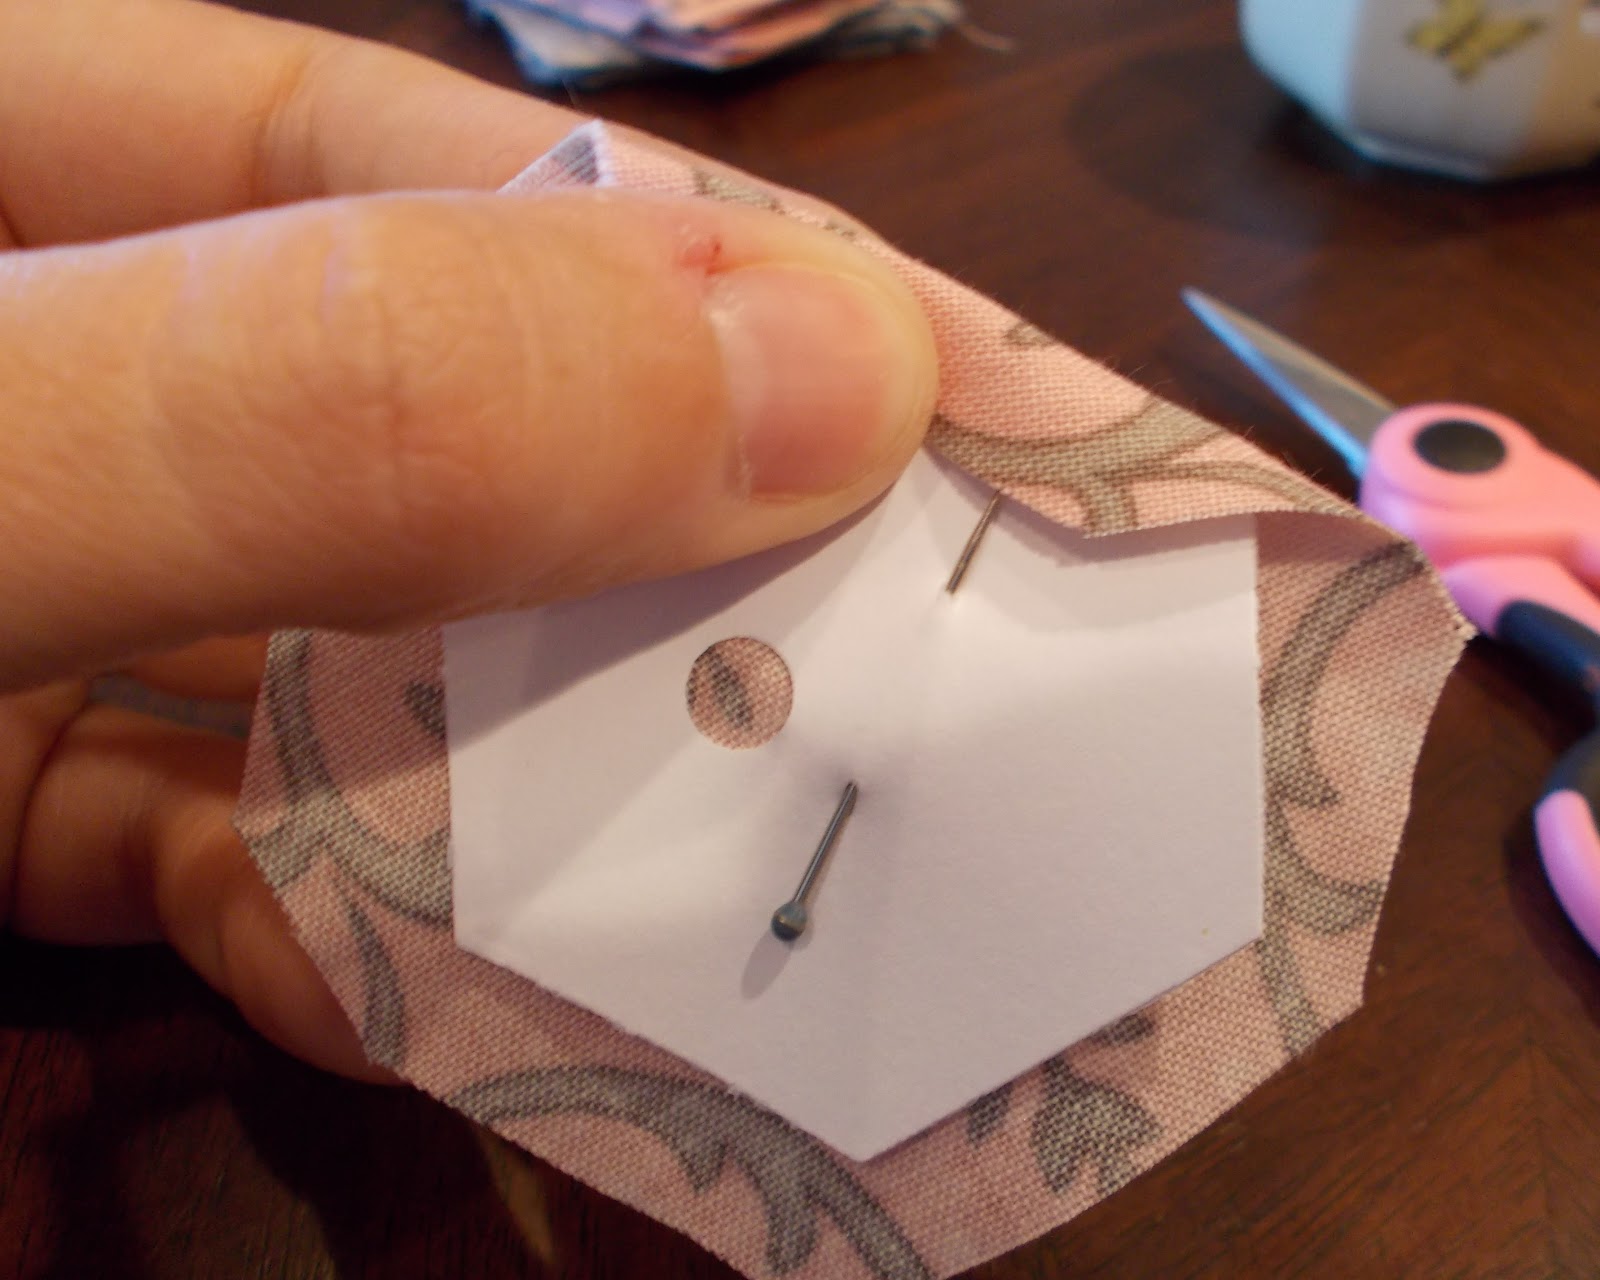
Step 4: The first corner: Carefully fold down the first edge and finger press. I like to start on the side the pin points at, because I find it shifts less that way. You might find differently. Fold down the adjacent side. I work counter clockwise, since I am right handed. Be careful not to get overly enthusiastic and fold down your paper too. It will look like this.
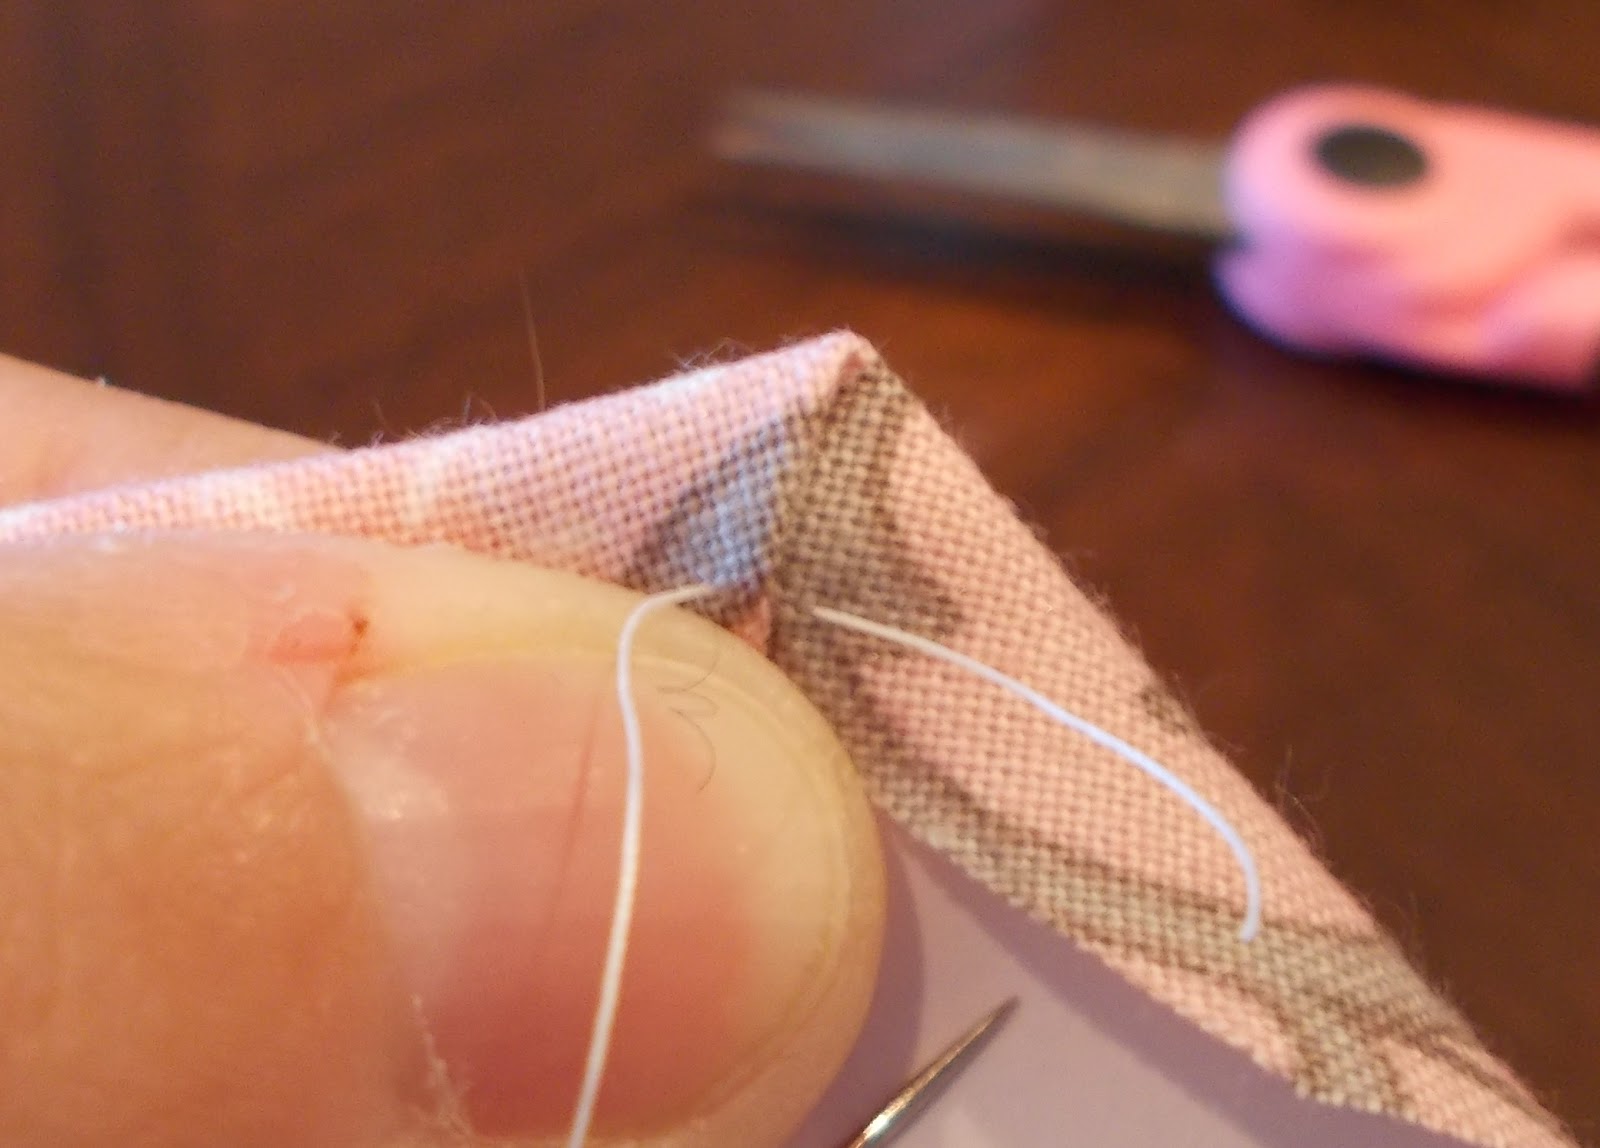
Using a fairly long thread, withOUT a knot, and by coming up from the right side/ bottom make two or three tiny stitches holding that fold down. If you do small tight stitches, and leave about a half inch tail, you do not need a knot. It is much much faster to not tie it off every time. Do NOT stitch through your paper. It will look like this:
Step 5: Working counterclockwise, fold the next corner and tack it down with one stitch. You will work all the way around your paper in this manner. Be careful not to pull the fabric so tight that the fabric shifts on the paper.
Step 6: The last corner, which is the first corner. When you get to the last corner take two or three more tiny stitches, clip your thread and remove the pin. Your hex is done! It will look like this on the back:
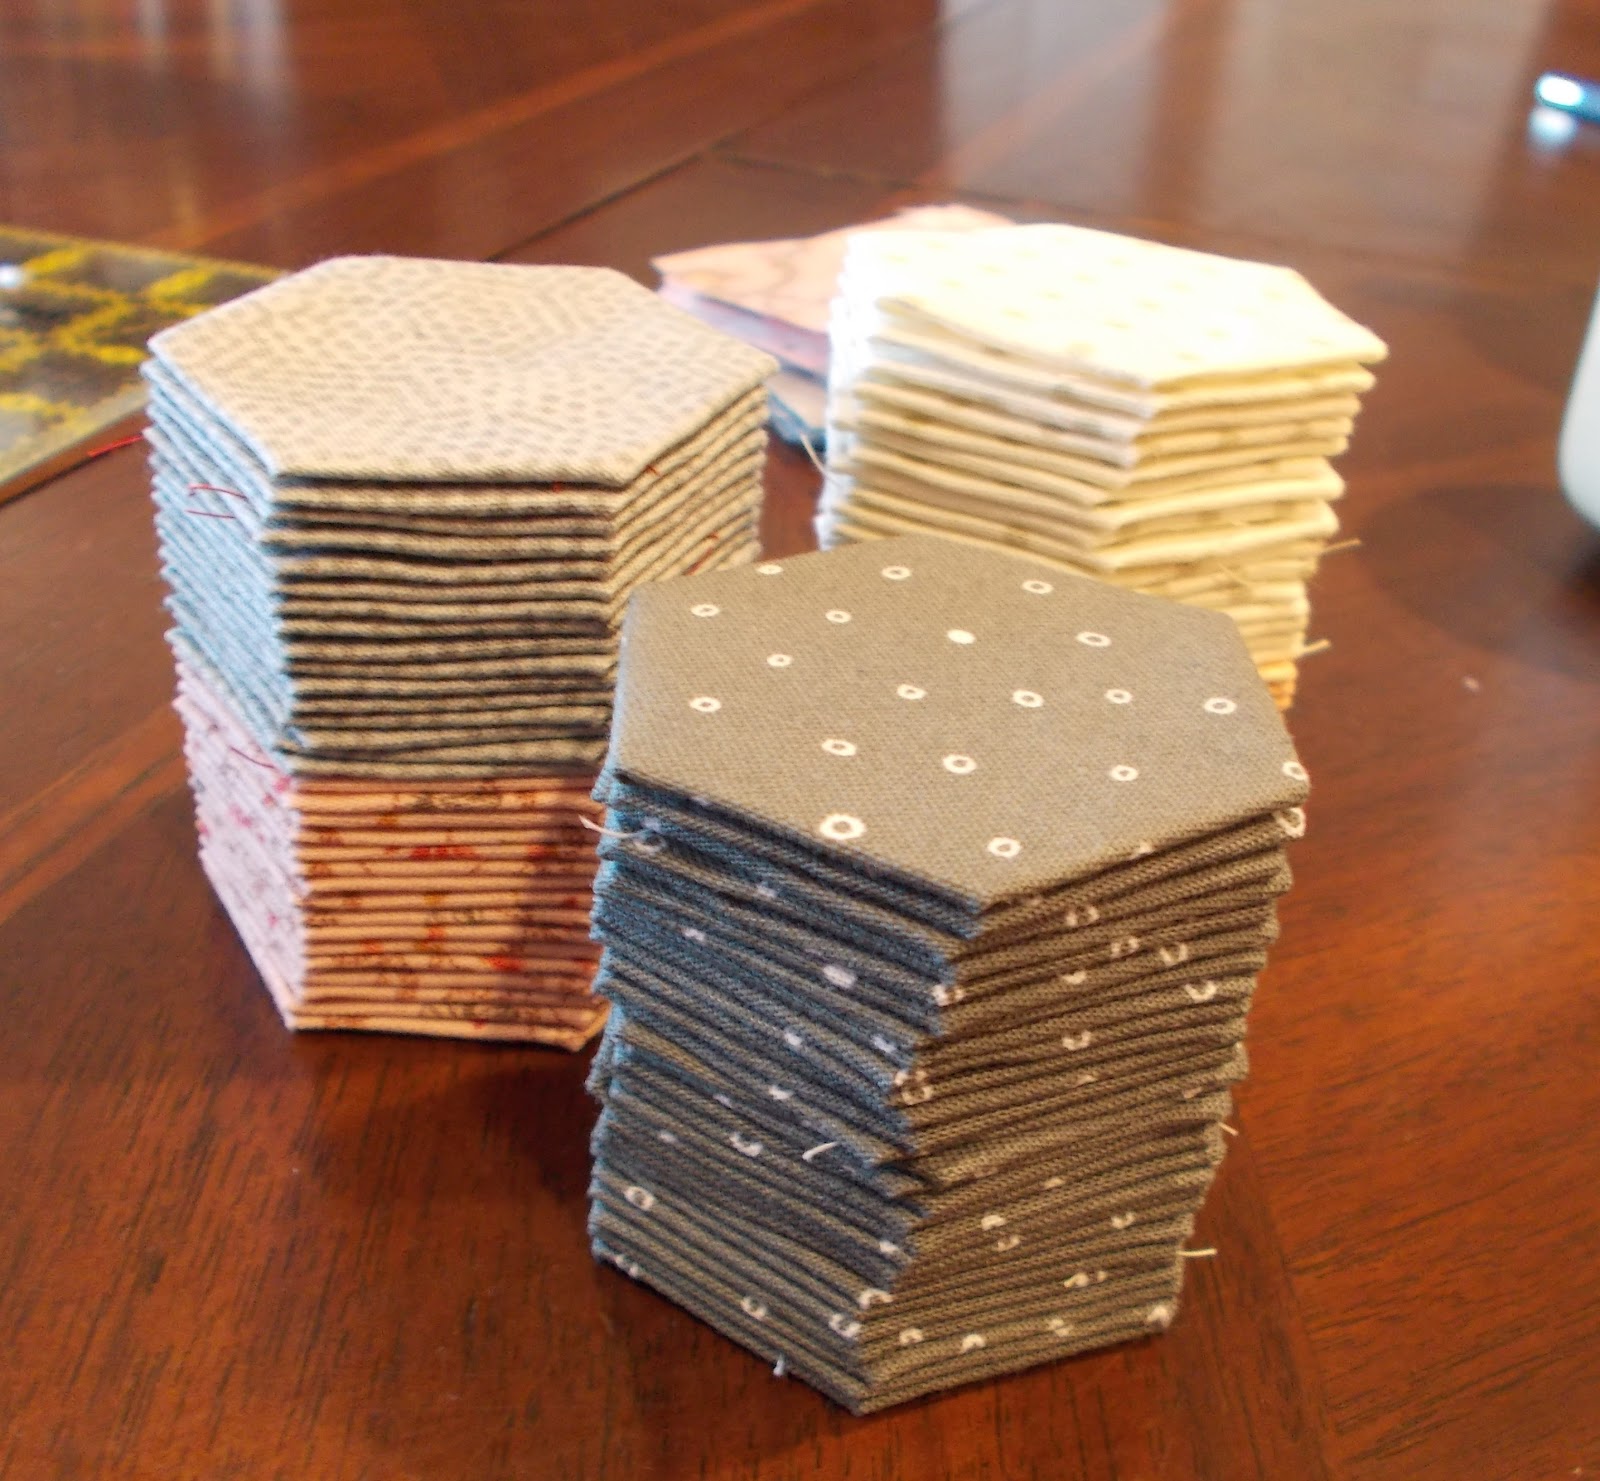
Step 7: Do it again. And again. And again. Iron those babies crisp and make a little stack. (I like to iron in batches, not one at a time.)
Because you did not sewn through your papers, you do not have to remove the basting stitches later. (Unless you basted the paper to the fabric in step 3. Then you have to remove those.) After you sew your hexes together, you'll stick a chopstick or other pointy thing in the hole you punched and pop all the papers out. Don't do this until it's sewn onto another tho, or it'll lose it's shape. Depending on your layout and paper choice, you may be able to reuse your papers several times before they are ragged. For example, if you do a traditional Grandmother's Flower Garden, you can sew the flowers into units as you go. If you're going to do a more planned layout like my pink and gray hexagon quilt, you will have to make the majority of your hexes before sewing ANY of them together- which means you're gonna need a hell of a lot of papers. You can go here for a calculator to see just how many. If you're lucky, I'll come back and show you how to sew them all together later!
So now you all know how to make English Paper Piecing Hexagons. Go forth and make some! And then come back and leave me a link, ok? And if something seems confusing, let me know.
PS. If anyone wants to make a small handful of pink or gray or pink and gray hexagons I'd love to work them into the quilt I'm making, so I could tell her mommy's friends helped.
You might also be interested in this post where I show my hexagon organization.
EDITED TO ADD: Trish has somehow turned this into an informal quiltalong. There is NO time limit and no formal signup. I created a flickr group so we can share pictures, please ask to join even if you don't plan to jump right in, the more the merrier (but I didn't want just random people adding random pics, so you have to ask.) You can follow us on Twitter with the hashtag #hexchat.
Here's what you'll need:
Needles
Thread (it doesn't matter what type but I use hand quilting thread because it's stiffer and tangles less without having to do extra steps like run it through a dryer sheet.)
Small pins
Fabric
Printer paper, card stock or freezer paper, your choice.
Scissors
A printer
A hole punch (optional)
My instructions are for a 1" paper pieced hexagon. A hexagon is measured along one side, not across the middle. If you are using a different sized hexagon, your fabric measurements will be different. For a 1" hexagon you will need a fabric square that is 2.5" x 2.5". You can find measurements for other sizes here.
Step 1: Make your paper templates. Print your hexagons onto your paper of choice. Freezer paper is harder to do, but it will iron onto your fabric, which is useful for fussy cut hexes. Measure one side of the hex to be sure your printer didn't resize anything for you, because if it did, you will be very angry later. Carefully cut out your hexes. I like to use this template that Megan showed me, because they are not nested and you don't have to be quite as careful. I find it goes faster even if I'm cutting twice as many edges. Cut out way more than you think you'll use, because you'll get addicted. I like to use a hole punch to punch a hole in the center of each of my paper pieces, because it makes them easier to remove later. This is optional. If you are too lazy or pressed for time to do this, you can order precut papers from www.paperpieces.com. I ordered a small batch to test- they are made of card stock and do not have a hole. They are lovely to work with and the card stock does make making hexes easier, but it is not necessary. I'm not showing you a picture of how to cut paper (that's what kindergarten was for), but here's what they look like when you're done:
Step 2: Cut your fabric into 2.5" squares. You don't need to be exactly precise, so if you have a scrap that is slightly wonky, it'll probably work. You just need to make sure you have about 1/4" margin all the way around. You can fussy cut them, or just whack through a bunch of fabric. I find it more relaxing to not be fussy cut, but it's awfully cute to do a little bird on a hex.
Step 3: Center a paper piece on the WRONG side of your fabric. Some people can pinch it firmly enough to not need to pin it. Some people like to use one pin, some use two. Some people use a couple basting stitches to hold it still. If you use freezer paper you will iron it on. I like to use one tiny pin, and then pinch it. If you find it's still sliding, add a second pin in the shape of an X. You will have little fabric corners hanging off. You can trim those, or not, it's up to you. If you do, leave a 1/4" seam allowance. From what I can tell, this will matter more on hand quilted quilts in the end.
Or with the corners clipped, note how it doesn't have to be precise.
Step 4: The first corner: Carefully fold down the first edge and finger press. I like to start on the side the pin points at, because I find it shifts less that way. You might find differently. Fold down the adjacent side. I work counter clockwise, since I am right handed. Be careful not to get overly enthusiastic and fold down your paper too. It will look like this.
Using a fairly long thread, withOUT a knot, and by coming up from the right side/ bottom make two or three tiny stitches holding that fold down. If you do small tight stitches, and leave about a half inch tail, you do not need a knot. It is much much faster to not tie it off every time. Do NOT stitch through your paper. It will look like this:
Step 5: Working counterclockwise, fold the next corner and tack it down with one stitch. You will work all the way around your paper in this manner. Be careful not to pull the fabric so tight that the fabric shifts on the paper.
Step 6: The last corner, which is the first corner. When you get to the last corner take two or three more tiny stitches, clip your thread and remove the pin. Your hex is done! It will look like this on the back:
The difference between clipping your corners or not.
Step 7: Do it again. And again. And again. Iron those babies crisp and make a little stack. (I like to iron in batches, not one at a time.)
Because you did not sewn through your papers, you do not have to remove the basting stitches later. (Unless you basted the paper to the fabric in step 3. Then you have to remove those.) After you sew your hexes together, you'll stick a chopstick or other pointy thing in the hole you punched and pop all the papers out. Don't do this until it's sewn onto another tho, or it'll lose it's shape. Depending on your layout and paper choice, you may be able to reuse your papers several times before they are ragged. For example, if you do a traditional Grandmother's Flower Garden, you can sew the flowers into units as you go. If you're going to do a more planned layout like my pink and gray hexagon quilt, you will have to make the majority of your hexes before sewing ANY of them together- which means you're gonna need a hell of a lot of papers. You can go here for a calculator to see just how many. If you're lucky, I'll come back and show you how to sew them all together later!
So now you all know how to make English Paper Piecing Hexagons. Go forth and make some! And then come back and leave me a link, ok? And if something seems confusing, let me know.
PS. If anyone wants to make a small handful of pink or gray or pink and gray hexagons I'd love to work them into the quilt I'm making, so I could tell her mommy's friends helped.
You might also be interested in this post where I show my hexagon organization.
EDITED TO ADD: Trish has somehow turned this into an informal quiltalong. There is NO time limit and no formal signup. I created a flickr group so we can share pictures, please ask to join even if you don't plan to jump right in, the more the merrier (but I didn't want just random people adding random pics, so you have to ask.) You can follow us on Twitter with the hashtag #hexchat.

Tuesday, July 03, 2012
Dress alteration, before and after, how to.

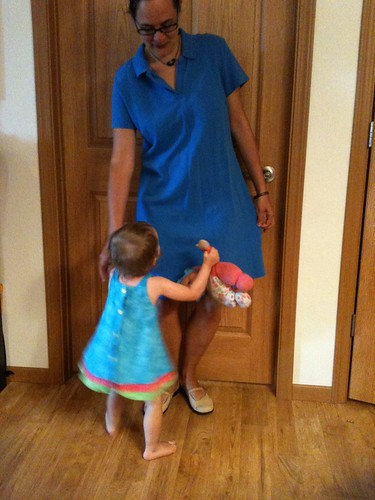
7+ years ago when the Pirate was born I bought this cheap knit dress at Walmart to wear home from the hospital. I thought it would be comfortable and soft and still look decent for the inevitable coming home picture. And then the Pirate spent a week in the NICU and I was nursing, so I never wore it. I think I may have worn it once or twice while pregnant with the Princess. I recently got a similar style dress at the thrift store and have worn it twice in a week, so thought maybe this one should have a new life.

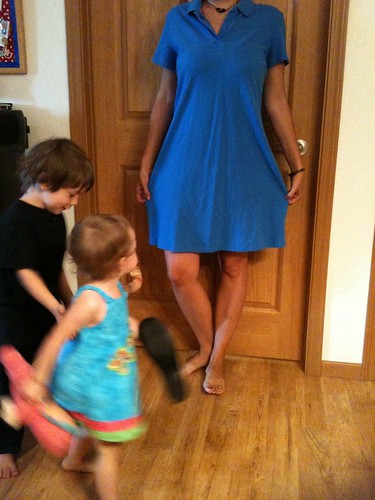
I'm going to show you how I did it, but please know there are other- better- tutorials out there. I'm not experienced with knits and my armhole shaping is hit or miss. I also didn't take in the shoulders, and you'd want to do so to be more professional. I don't care, because for me it's completely wearable. Also, I had lots of help and not infinite time, so you don't get well edited before and after pictures. This post is a pretty good indication of how everything gets done at my house.

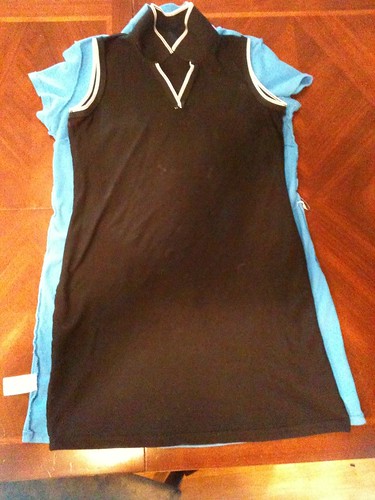
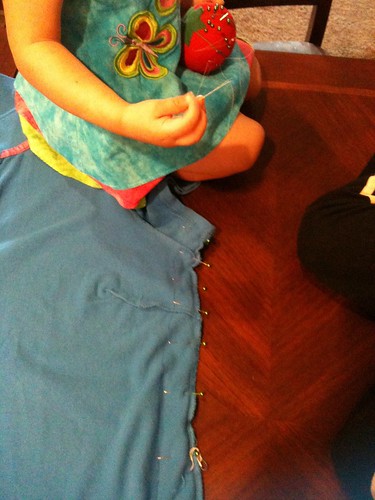
The first thing I did was turn it inside out and put the one that fits well on top of it. I traced along the side seams and marked where the armhole of the new dress fell.
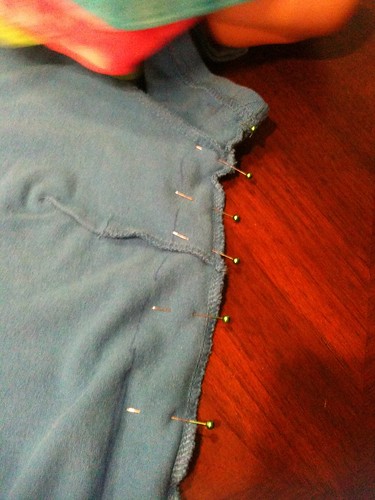
I removed the new dress, and carefully pinned all the way down, making sure it was nice and flat. I had lots of help.

Then I transferred to my serger and carefully sewed all the way down my line, removing the pins as I went. (Sorry, didn't take a picture of that. Imagine sewing on a line. Pretty easy to imagine, no?) If you don't have a serger you could do this on your regular machine, with a zigzag stitch.
I turned the dress right side out again, and Ta-Da! New wearable dress!

And it only took me 7 years and 30 minutes to do!
Thursday, June 14, 2012
The Nook Color, part one: I haz a Nook!
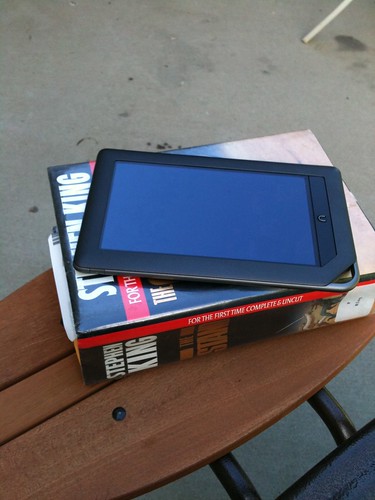
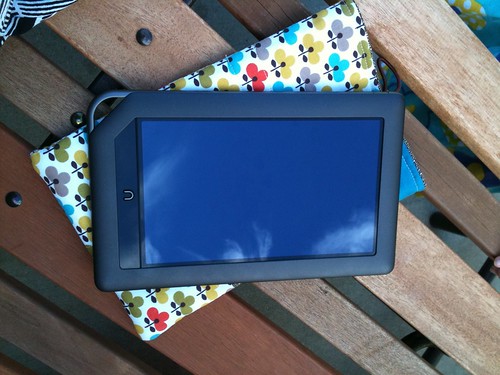
For my birthday, Mike suprised me with a Nook Color! It was completely out of the blue and unexpected. I was pretty content with reading books on my iPhone, but he thought I needed an e-reader.

(Ignore the dog, the grill and the mess in that picture. It's really hard to take a picture of a Nook. They are very reflective.)
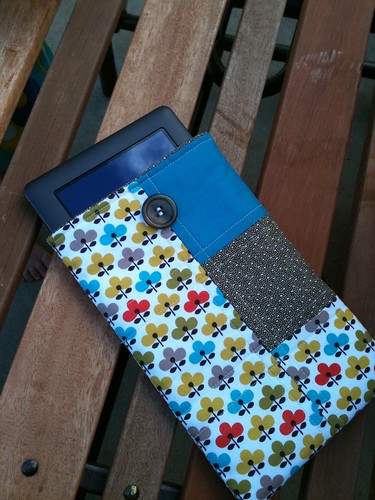
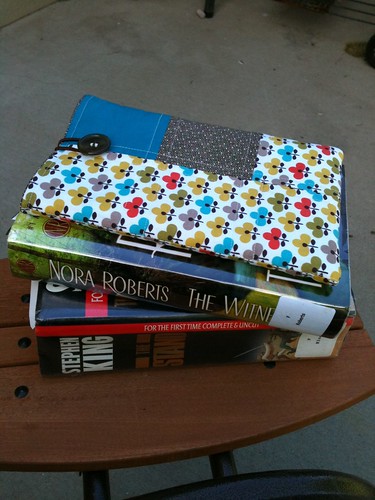
I decided that it definitely needs a cover, so that I don't immediately scratch it up, and found this terrific free tutorial online.

I choose to use a hair elastic for the closure instead of a piece of twine, and I used fusible fleece for the batting, but only because that's what I had. In hindsight, I wish I'd done a double layer.

I made the case about 1/2" longer than directed, as she indicated that the reader in the picture was slightly smaller.

The Stand has some competition now.

Stay tuned for The Nook Color, part two: my thoughts on the Nook itself.

(Ignore the dog, the grill and the mess in that picture. It's really hard to take a picture of a Nook. They are very reflective.)
I decided that it definitely needs a cover, so that I don't immediately scratch it up, and found this terrific free tutorial online.

I choose to use a hair elastic for the closure instead of a piece of twine, and I used fusible fleece for the batting, but only because that's what I had. In hindsight, I wish I'd done a double layer.

I made the case about 1/2" longer than directed, as she indicated that the reader in the picture was slightly smaller.

The Stand has some competition now.

Stay tuned for The Nook Color, part two: my thoughts on the Nook itself.
Thursday, September 29, 2011
Tutorial: How to make a friendship bracelet
One of the things I've wanted to do on my blog is post a handful of FREE TUTORIALS. This morning I had the perfect opportunity to write one up. I even took pictures!
Step 1: Make sure the house is clean.

And the dishes are done

Step 2:
Go back in time to 1995 and haul out your special edition Beauty and the Beast cup from Burger King. And some thread. Be very impressed when the Bug calls it thread, and not string or rope.

Step 3:
Crank up some PM Dawn.
Step 3.5:
No, louder than that.
Step 4:
Pin to your leg and start tying.

Step 5:
Tie off and tie onto the Princess, who is squirmy. "Oooohhhh," says the Princess.

Step 6:
Repeat for Bo Peep

Step 7:
Make one for The Bug, who insists he wants one and who will reject it. Wear on your own arm instead.
Along with your Life is Good bracelet and two rubber bands, of course.
Step 8:
Consider starting a second Etsy Shop.
Step 8.5: Or moving to live on the beach in Cabo, accosting tourists.
Step 9:
Consider writing a note for Mike, asking him to check YES or NO, and folding it into a fancy little rectangle with a pull tab.
Step 10:
Skip note writing in favor of teaching the Princess and Bo Peep how to play M.A.S.H. instead.
*Or 1989, which is the last time I remember making them.**
**Though the process is awfully similar to hair wraps, which I definately was making in 1993.
- Posted using BlogPress from my iPhone
Step 1: Make sure the house is clean.

And the dishes are done

Step 2:
Go back in time to 1995 and haul out your special edition Beauty and the Beast cup from Burger King. And some thread. Be very impressed when the Bug calls it thread, and not string or rope.

Step 3:
Crank up some PM Dawn.
Step 3.5:
No, louder than that.
Step 4:
Pin to your leg and start tying.

Step 5:
Tie off and tie onto the Princess, who is squirmy. "Oooohhhh," says the Princess.

Step 6:
Repeat for Bo Peep

Step 7:
Make one for The Bug, who insists he wants one and who will reject it. Wear on your own arm instead.

Along with your Life is Good bracelet and two rubber bands, of course.
Step 8:
Consider starting a second Etsy Shop.
Step 8.5: Or moving to live on the beach in Cabo, accosting tourists.
Step 9:
Consider writing a note for Mike, asking him to check YES or NO, and folding it into a fancy little rectangle with a pull tab.
Step 10:
Skip note writing in favor of teaching the Princess and Bo Peep how to play M.A.S.H. instead.
*Or 1989, which is the last time I remember making them.**
**Though the process is awfully similar to hair wraps, which I definately was making in 1993.
- Posted using BlogPress from my iPhone
Subscribe to:
Posts (Atom)