Blog Widget by LinkWithin
Showing posts sorted by relevance for query pink hexagon. Sort by date Show all posts

Tuesday, October 30, 2012

Pink and gray hexagon quilt for baby girls

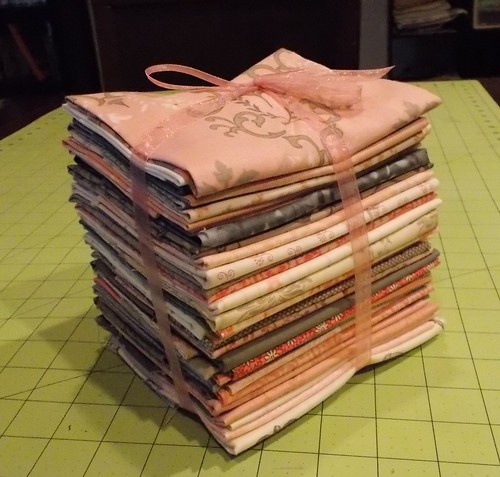
Remember when I told you I was obsessed with sewing hexagons? Well I talked and talked and dreamed and talked about the idea of doing a pink and gray hexagon quilt for the Princess with my friend Lisa from gitdownkitty.  Lisa happens to work at a quilt shop AND be a very generous person.  Friday in the mail I found this.

Pink and gray fabric stack 005

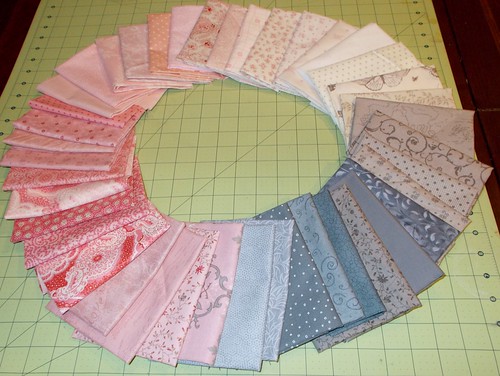
Guess it's time to put her money where my mouth is. (I'm gonna need more gray, don't you think?)

Pink and gray fabric gradient circle

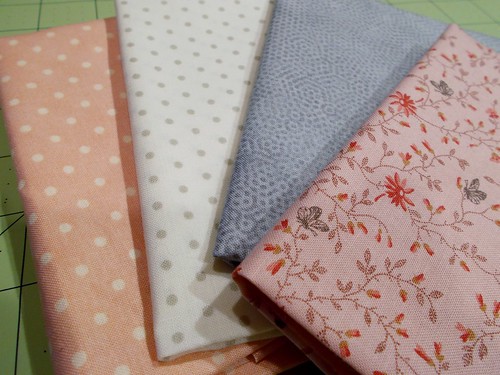
I'm starting with these four, because I love them. (Seriously, who does not love polka dots?)

pink and gray hexagon fabrics

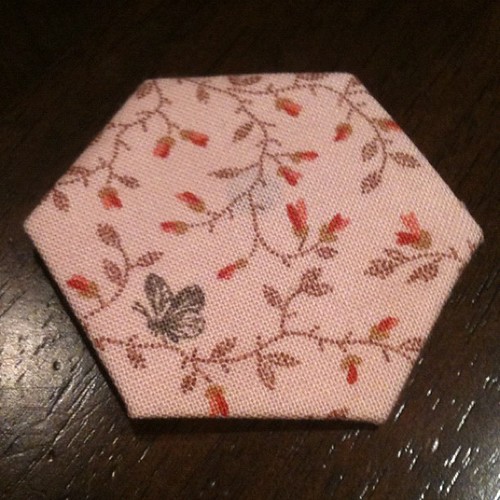
This fabric has little gray butterflies on it. Lauren loves "flyflies".

Flyfly on my hex!

I'm planning to do a layout that is somewhere between this (yes, I know this is not a quilt):

Source: weheart.co.uk via Lisa on Pinterest

and this:


but all in shades of gray and pink. In theory, I'd like to finish this one before the rainbow one, but we'll see.

Monday, January 06, 2014

Hexagon quilt update #1-2014

You all remember the pink and gray hexagon quilt, right? I've renamed it the Vines and Flowers quilt, because after much deliberation I've finally settled on a layout. I'll be making a long snaky gray vine through the middle like you see here. This graph has the same number of hexies as my final quilt.

And filing in the white space with traditional hexagon flowers like these


I have finally settled on a method for both basting and storage. I use one of the kids old playmobil boxes that came with dividers for my sewing kit. There are spaces for my fabric clips, thread, papers, thimble, needles, and fabric. It can hold a small quantity of basted hexies as well. And a kitten. (This is an older picture, like weeks ago, Sirius Black has doubled in size.)

I have a small basket on an upstairs shelf with extra papers, fabric squares, and the finished flowers. This is short term storage, because of course I have an entire sewing room in the basement. Every so often (usually when I finish up a fabric print) I count up the completed hexies and add them to this box. As of this writing I'm at 1347.


As I grow bored with basting, I make 7 unit flowers. Every time I think I'm making progress I remember that I'm only roughly half done basting and have a long long ways to go. My goal for 2014 is to finish all the basting and have a decent start on the flowers.

I've decided to make the centers of most of the flowers a solid pink (any shade of pink) and use the prints for the petals. The spaces between the flowers will be the white or cream backgrounds. I think this will make the flowers stand out better. Most of the flowers will be the seven unit flowers, but I will do some with the second ring around them as well. Of course I didn't make these decisions until I had this small part done, but learn as you go, right?

All of this will hopefully become clearer as I get more of them sewn together.

Now, if you've read that far, I have a favor to ask of any of my sewing friends. My tiny town only has two tiny quilt shops and Walmart for fabric. I have exhausted their supplies of solid pinks. I don't need a half yard of any one shade, but rather an eighth yard of several or I'd order online. Or really even scraps of several. If you have any solid pink scraps that you'd be able to send my way, I'd be eternally grateful. I am especially in need of pale pinks, blush pinks. I will pay, of course, and for postage as well. I will eventually need more pink prints, but those are easier to find.

I'm linking up with Jessica at Life Under Quilts for her Monday morning star count.


Tuesday, November 06, 2012

Paper pieced hexagon basting tutorial

It is true that you can find tons of tutorials for paper piecing online, but sometimes you want someone you know to show you how they do things.  I make no claims that this is the best way, or the best tutorial, or the correct way (tho I do believe there is no correct way to do much of anything in sewing- except maybe thread your machine...) I am madly addicted to the little things, because you can literally pick one up and do ONE. You can do them while you are watching tv or while having coffee with friends. They are so easily portable. I love them.

Here's what you'll need:

Needles
Thread (it doesn't matter what type but I use hand quilting thread because it's stiffer and tangles less without having to do extra steps like run it through a dryer sheet.)
Small pins
Fabric
Printer paper, card stock or freezer paper, your choice.
Scissors
A printer
A hole punch (optional)

My instructions are for a 1" paper pieced hexagon. A hexagon is measured along one side, not across the middle. If you are using a different sized hexagon, your fabric measurements will be different. For a 1" hexagon you will need a fabric square that is 2.5" x 2.5".  You can find measurements for other sizes here.

Step 1: Make your paper templates. Print your hexagons onto your paper of choice. Freezer paper is harder to do, but it will iron onto your fabric, which is useful for fussy cut hexes. Measure one side of the hex to be sure your printer didn't resize anything for you, because if it did, you will be very angry later. Carefully cut out your hexes. I like to use this template that Megan showed me, because they are not nested and you don't have to be quite as careful. I find it goes faster even if I'm cutting twice as many edges.  Cut out way more than you think you'll use, because you'll get addicted. I like to use a hole punch to punch a hole in the center of each of my paper pieces, because it makes them easier to remove later. This is optional. If you are too lazy or pressed for time to do this, you can order precut papers from www.paperpieces.com. I ordered a small batch to test- they are made of card stock and do not have a hole. They are lovely to work with and the card stock does make making hexes easier, but it is not necessary. I'm not showing you a picture of how to cut paper (that's what kindergarten was for), but here's what they look like when you're done:


Step 2: Cut your fabric into 2.5" squares. You don't need to be exactly precise, so if you have a scrap that is slightly wonky, it'll probably work.  You just need to make sure you have about 1/4" margin all the way around. You can fussy cut them, or just whack through a bunch of fabric. I find it more relaxing to not be fussy cut, but it's awfully cute to do a little bird on a hex.


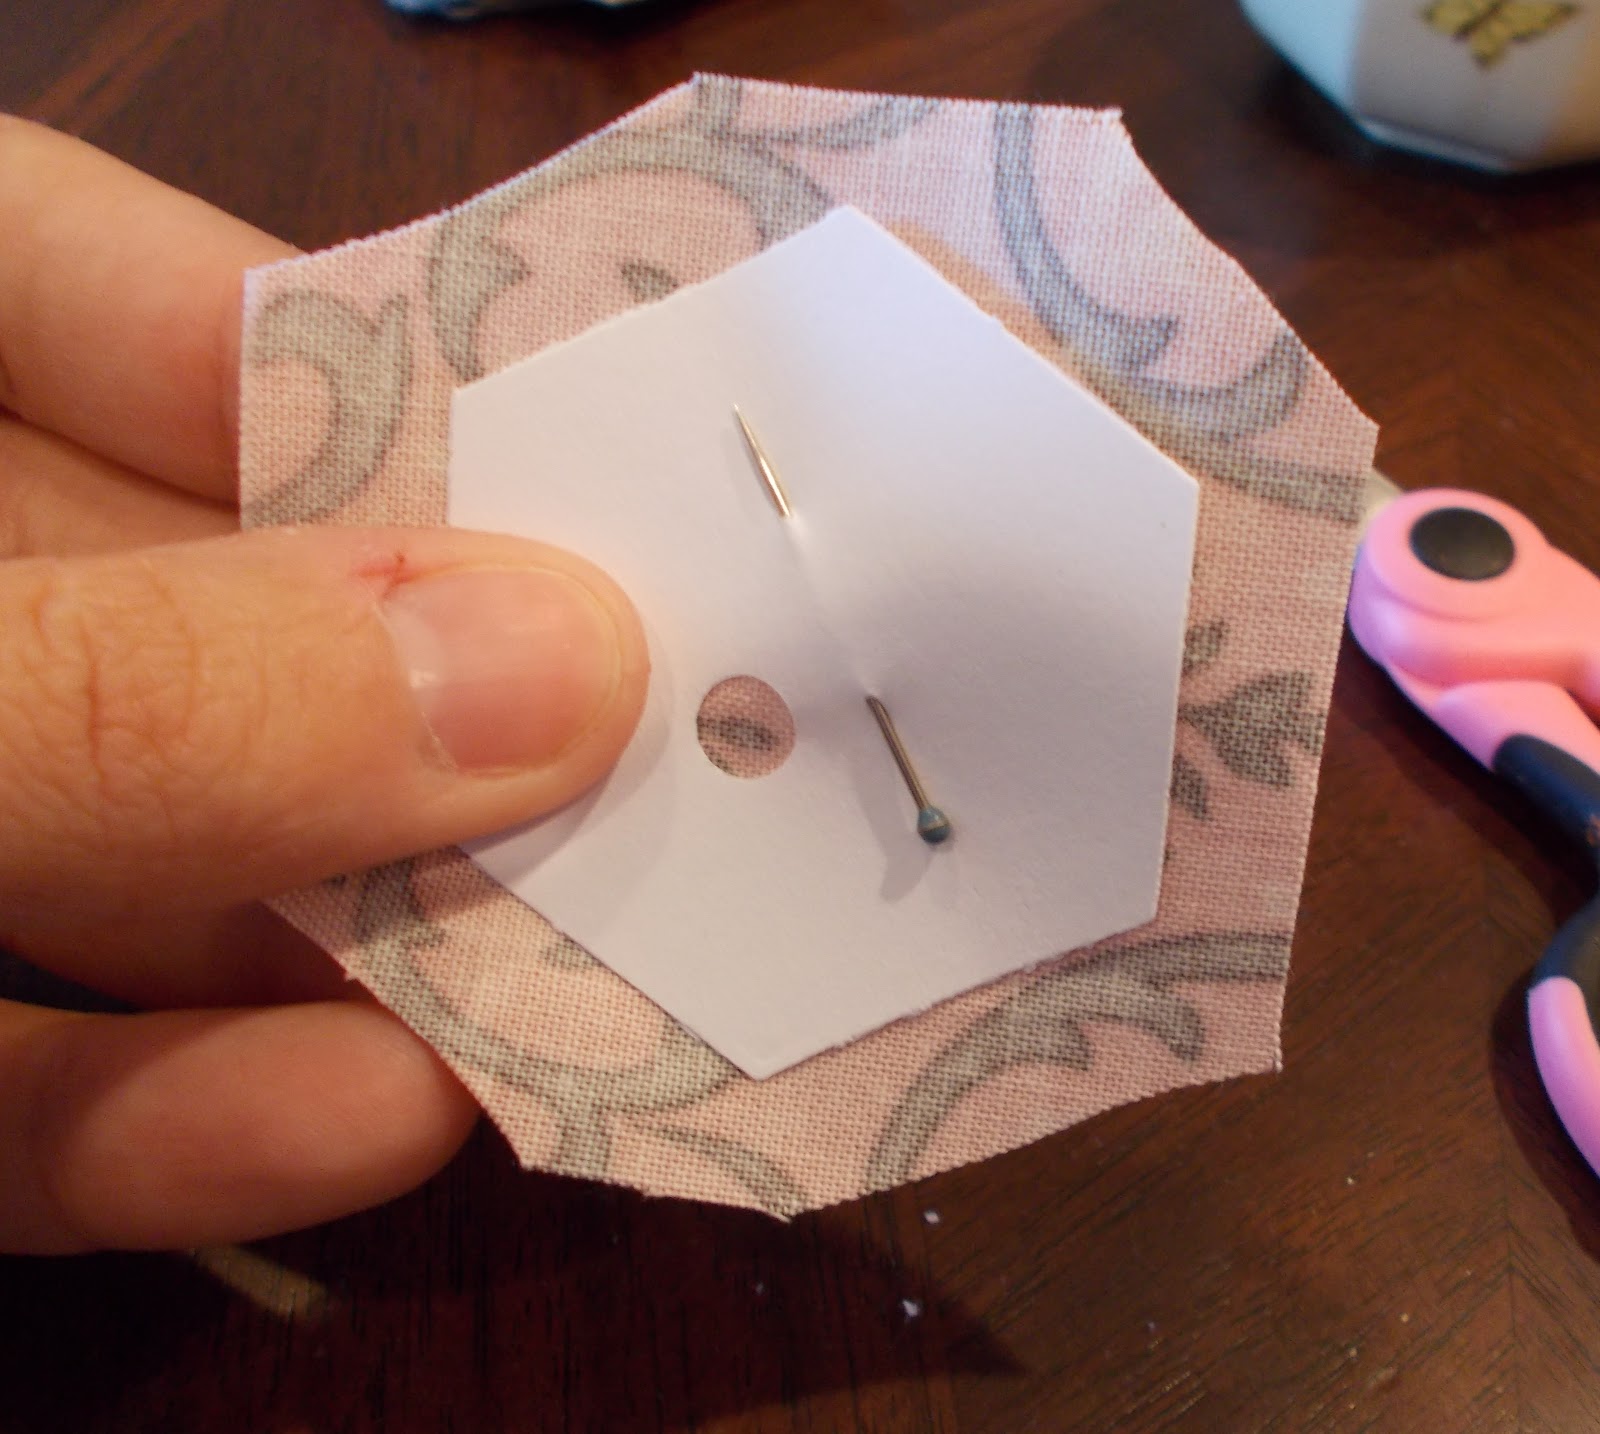
Step 3: Center a paper piece on the WRONG side of your fabric. Some people can pinch it firmly enough to not need to pin it. Some people like to use one pin, some use two. Some people use a couple basting stitches to hold it still. If you use freezer paper you will iron it on. I like to use one tiny pin, and then pinch it.  If you find it's still sliding, add a second pin in the shape of an X.  You will have little fabric corners hanging off. You can trim those, or not, it's up to you. If you do, leave a 1/4" seam allowance. From what I can tell, this will matter more on hand quilted quilts in the end.

 Or with the corners clipped, note how it doesn't have to be precise.


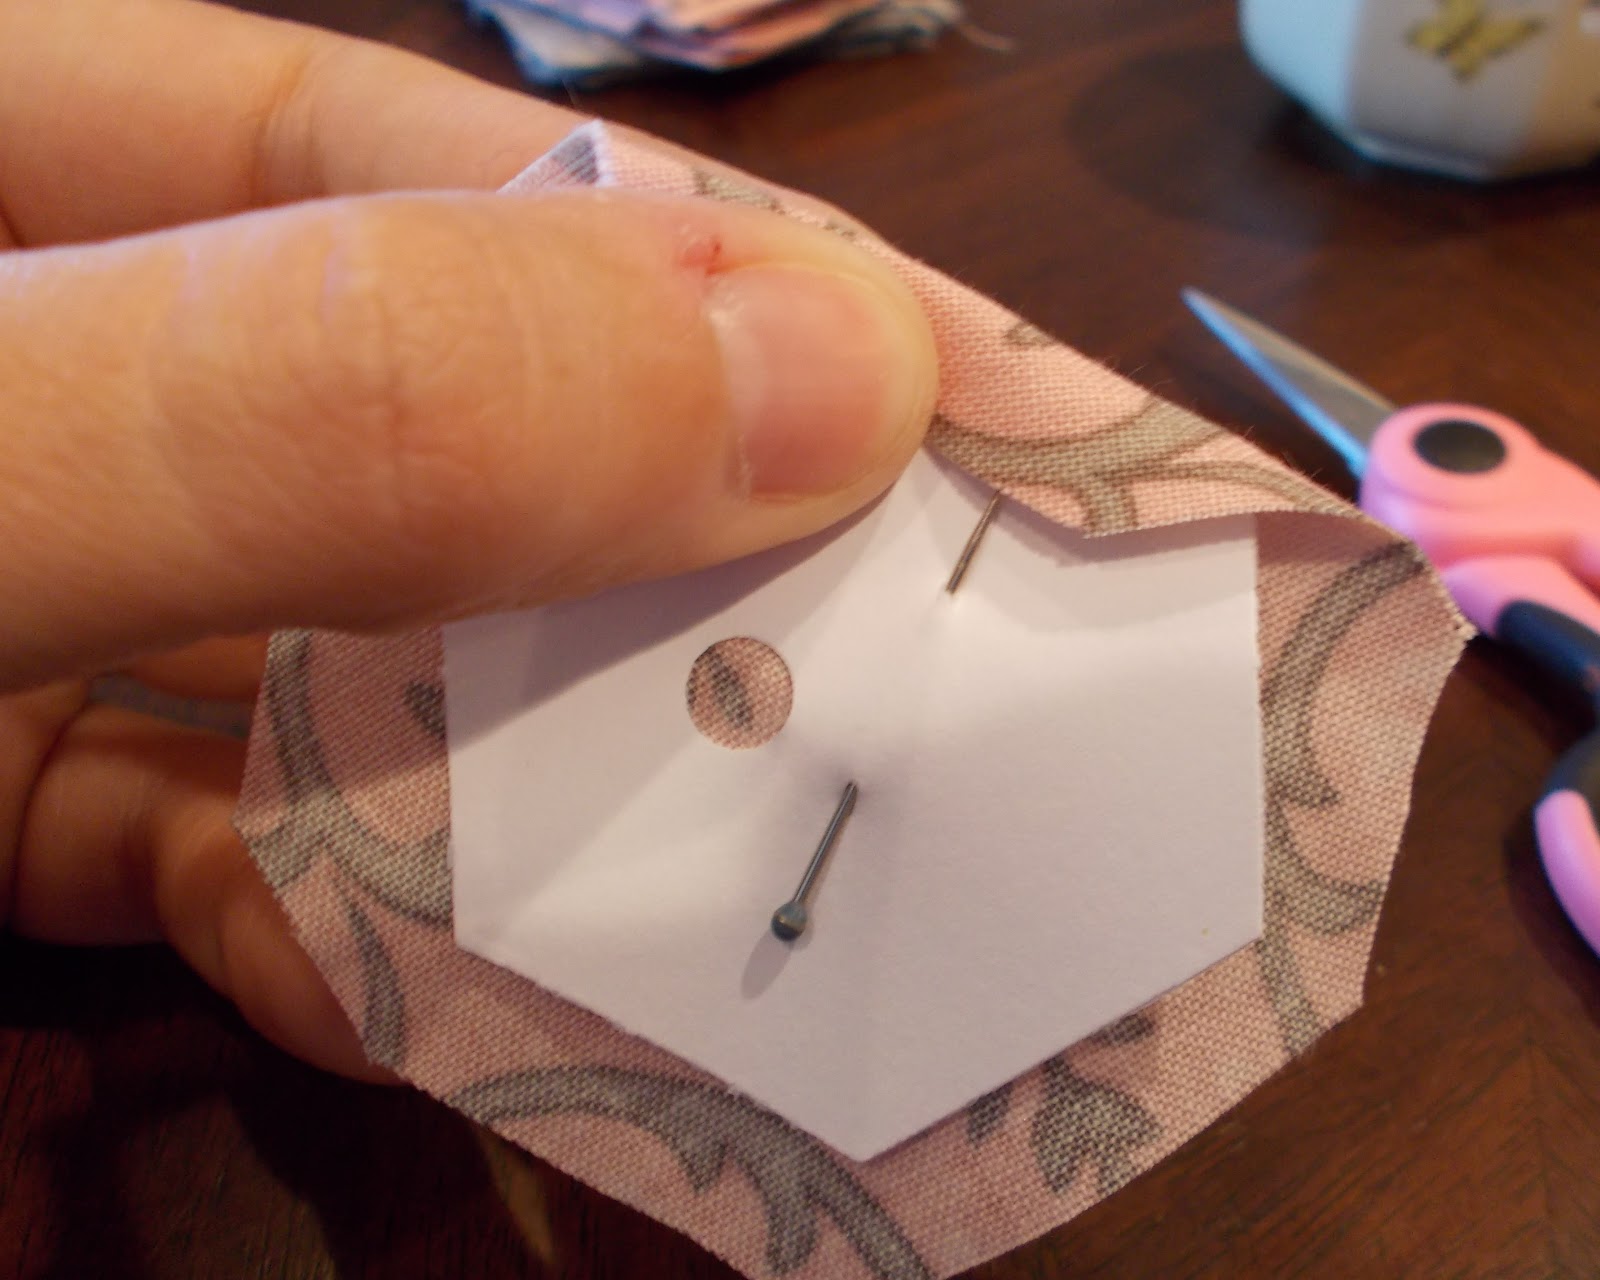
Step 4: The first corner: Carefully fold down the first edge and finger press. I like to start on the side the pin points at, because I find it shifts less that way. You might find differently. Fold down the adjacent side. I work counter clockwise, since I am right handed.  Be careful not to get overly enthusiastic and fold down your paper too. It will look like this.

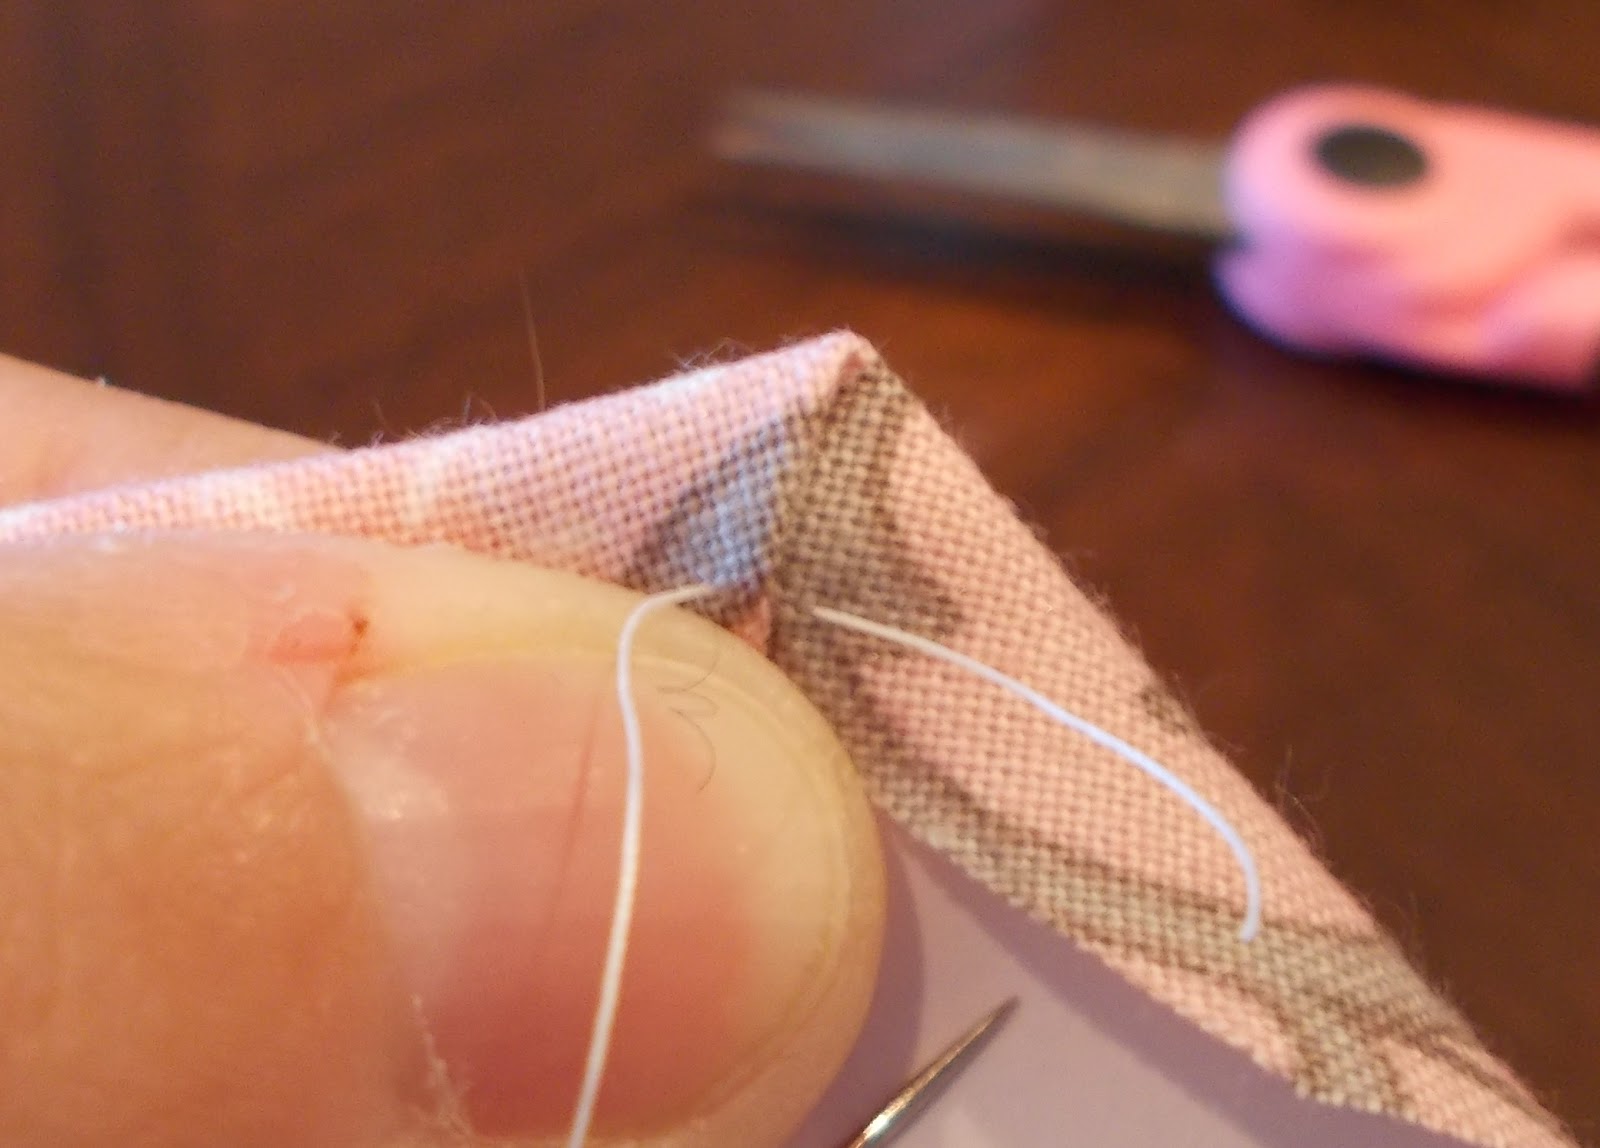
Using a fairly long thread, withOUT a knot, and by coming up from the right side/ bottom make two or three tiny stitches holding that fold down. If you do small tight stitches, and leave about a half inch tail, you do not need a knot. It is much much faster to not tie it off every time.  Do NOT stitch through your paper. It will look like this:


Step 5:  Working counterclockwise, fold the next corner and tack it down with one stitch. You will work all the way around your paper in this manner. Be careful not to pull the fabric so tight that the fabric shifts on the paper.

Step 6: The last corner, which is the first corner. When you get to the last corner take two or three more tiny stitches, clip your thread and remove the pin. Your hex is done! It will look like this on the back:
 The difference between clipping your corners or not.


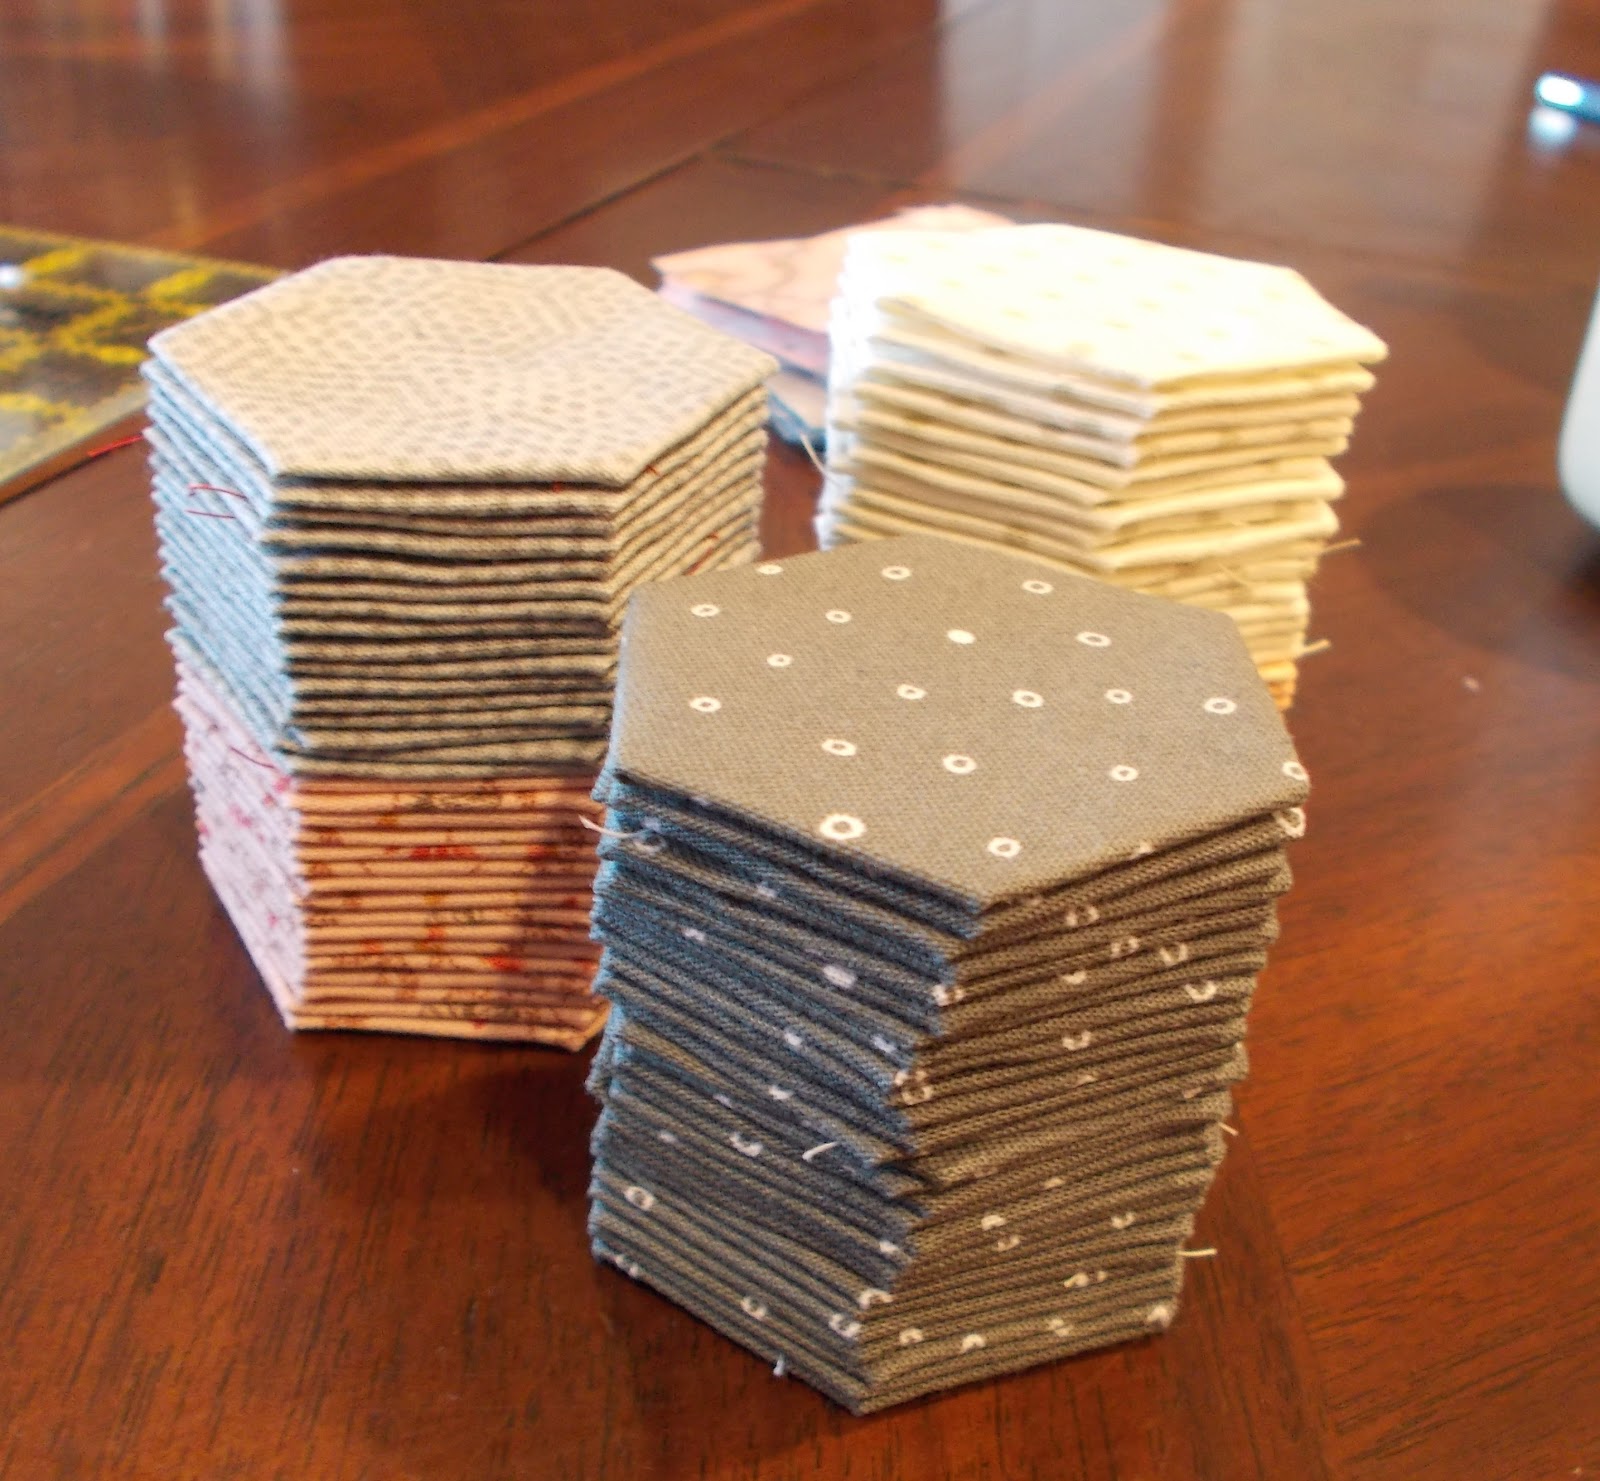
Step 7: Do it again. And again. And again. Iron those babies crisp and make a little stack. (I like to iron in batches, not one at a time.)

Because you did not sewn through your papers, you do not have to remove the basting stitches later. (Unless you basted the paper to the fabric in step 3. Then you have to remove those.)  After you sew your hexes together, you'll stick a chopstick or other pointy thing in the hole you punched and pop all the papers out. Don't do this until it's sewn onto another tho, or it'll lose it's shape.  Depending on your layout and paper choice, you may be able to reuse your papers several times before they are ragged. For example, if you do a traditional Grandmother's Flower Garden, you can sew the flowers into units as you go. If you're going to do a more planned layout like my pink and gray hexagon quilt, you will have to make the majority of your hexes before sewing ANY of them together- which means you're gonna need a hell of a lot of papers. You can go here for a calculator to see just how many. If you're lucky, I'll come back and show you how to sew them all together later!

So now you all know how to make English Paper Piecing Hexagons. Go forth and make some! And then come back and leave me a link, ok? And if something seems confusing, let me know.

PS. If anyone wants to make a small handful of pink or gray or pink and gray hexagons I'd love to work them into the quilt I'm making, so I could tell her mommy's friends helped.

You might also be interested in this post where I show my hexagon organization.

EDITED TO ADD: Trish has somehow turned this into an informal quiltalong. There is NO time limit and no formal signup. I created a flickr group so we can share pictures, please ask to join even if you don't plan to jump right in, the more the merrier (but I didn't want just random people adding random pics, so you have to ask.) You can follow us on Twitter with the hashtag #hexchat.


Monday, February 25, 2013

A Hexagon Quilt Update (including a how to video!)

Pink and gray paper pieced hexagons


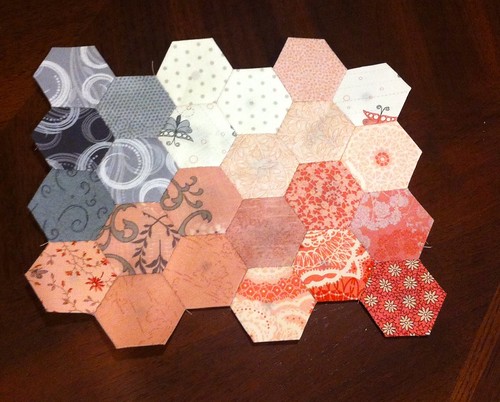
I know, you're all sitting around waiting for me to tell you how the pink and gray hexagon quilt is progressing. My ultimate goal is to make a full sized quilt, which will require 3025* 1" hexagons. I've made 718 so far. Trish kept pestering me, asking when I was going to start sewing them together, and while the real answer is "not until I am very nearly done making them", I couldn't resist making a small patch.  I think a lot of people who I've described the quilt to had a really hard time picturing my layout, perhaps this will help?  Unfortunately, all it's really done is make me want to sew more together! Like, some of the darker pinks around that bottom right one, and to extend the whites at the top up into cream and back into pale pink and and and... (I can't, because I want to be sure the distribution of the colors is nice and smooth.)

For those of you in the unofficial quilt-a-long, I made a really wobbly, incredibly unprofessional video of how I sew the hexes together. I kept looking at the screen instead of my hands and missing stitches, oops!


In reality, I tend to tilt the hand holding the hexes back and forth quite a bit more, so that I barely have to move the hand holding the needle. I tried to film it like that, but all I ended up with was a really nice video of my table as my hands moved in and out of the frame. I'll give it another shot one day. Maybe.

For those of you NOT in the quilt-a-long, who would like to be, the English paper piecing hexagon tutorial can be found here.

*It really requires just shy of 3000, but my goal is to make 3025 to make up for counting errors.

Monday, November 23, 2015

So, about that hexagon quilt?

It's been a while since I've updated you all on the progress of the hexagon quilt. I know you're all just dying to know.  Mike has taken to teasing me that she'll be in high school before I finish- maybe a graduation gift? Despite his teasing, progress is being made and there is an end in sight.

I can't tell you how many hexies I've actually basted at this point, and it's possible that some of the ones I've basted won't make the final quilt (there's one print in particular that isn't really a white, or a pink and I can't figure out how to use it.)  I need to baste quite a few more white/neutral ones as well.


All that said, here's where it stands.  The hexies that are marked in pink or orange are all sewn together. (ok, ok, it's two large pieces. I ran out of my preferred thread yesterday and had to stop.) This is pretty darn close to HALF, right? (Just agree, it makes me feel good.)  The green border will be whites and I may or may not do a pink row around that. It all depends on what's leftover when I get to there.

I almost didn't want to share this one, because I love the Big Reveal at the end, but I couldn't help myself.  The whites stand out so much more in a picture than in real life. I'm planning to pay the extra money to have it long arm quilted, and have each flower quilted as a flower, if possible. Similar to this.

I'd hoped to have the top done by her fifth birthday (August 2015), and then by Halloween 2015 (3  years from starting it), but now I'm really just thinking this spring. Maybe to be done by her 6th birthday?  I've been working pretty steadily the last few weeks, but I'll slow down again when I need to baste and I have no clue on the quilting process. I'm sure that prepping it and then binding it will be a challenge.

I'm linking up with the Monday Morning Star Count again today. Be sure to go check on everyone else's progress too!

Monday, September 02, 2013

New hexagon project!

Last week I finally caved and started a new hexagon project. I'm still chugging away on the pink quilt for the Princess, but I have quite a ways to go before I can actual sew hexies together and I needed some visible progress.


(Forgive the instagram link, I'm too lazy to go find the original and upload to flickr.)

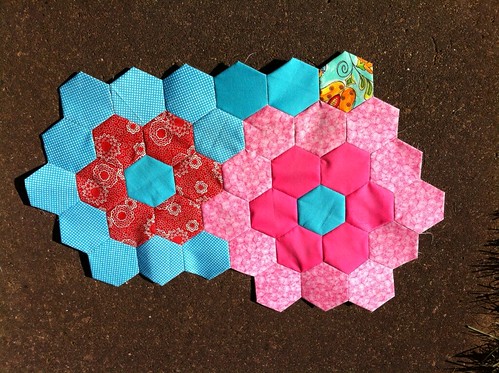
I cut out squares of pinks, reds, blues, aquas and teals and selected a larger hexagon template. These are 1.5" hexies, as opposed to the 1" hexies on the pink quilt, and they feel HUGE. I've worked on it a good bit this weekend and have two completed flowers/rings and started attaching the third this morning (at the top of the photo, weird angle there, sorry. There's two solids and the flowered one...)

New hexie project

My idea is to put them together using this sort of overlapping layout. I'm loving seeing the progress as I go and it's nice to get to switch it up with sewing them together. 


I'm linking up with Jessica at Life Under Quilts, go check out some other talented paper piecers.

Monday, June 01, 2015

Hexagon quilt update the millionth

I know you have all been waiting and waiting for an update on the Pink and Gray Hexagon quilt. It had reached a point where while I was making progress the updates looked very similar and of course all the photos were near identical. I have finally reached a new stage in the quilt. I've basted about 2200 hexies, out of 2900. (Rough numbers. I DO have the exact count, but I am not writing this from home.) I have sewn most of the hexies I have into flowers. I estimate I'm about 80 flowers short, but I'm not 100% certain until I get closer. I have started sewing them together, exciting, right?


I have drawn out a rough idea of what I want the layout to be. This is flexible, if they fit together better in another way I can change it, but it gives me a map to work off of and lets me know approximately what my progress is. I'm sewing the flowers together as indicated on the chart, but I don't always sew all the way around each flower. Right now I'm mainly interested in getting them attached so that I can see where I am, than in a finished solid piece.

In this picture you can see one large piece. These are all connected in some way, tho as you can tell not on all sides. The white arrows point at seams I've done, and the green arrows show what I have yet to sew. Yet if you lay it out on the table, and smooth it down, there are no holes or missing hexies, follow? My idea is that if I do this now, I can stop thinking about layout and placement and just sit down in front of the tv and mindlessly finish all the seams.


If you look super closely at the next picture, at the arrow, you can see a straight pin. Across the open space in the flowered hex there is another pin as well. Those pins are there to point at each other so if I lose track of where the large pieces go I can line them up.  Honestly tho, the more I add the easier it is to keep my place. It's like giant jigsaw pieces. I have three of them done now, and since I started at a corner they all have straight edges to line things up.


I'm somewhere between 1/5 and 1/4 done with the body of the quilt.  In this picture, the ones marked in orange are sewn together, except that I worked on it more since I took this picture and it's actually done all the way to the top edge of the picture.  The graph itself is folded, so you're only seeing 1/4 of the full layout.  The green on the edges will be a row of white/neutrals and then there will be another row of pink outside of that. Or perhaps pink and white. I plan to use up my leftovers in the border.

I have had a TON of help with this one. Every time I spread it out this helpful guy comes over to check on me. He's not at all interested in my needle and thread, but does feel pretty strongly that he needs to hold it all down. He also seems to be a major Friends fan and will stare at the iPad like he's following along.

On  side note, I just saw this episode last week, and I loved it just as much as the first time.


Mike is out of town all week this week, and I made a point to clear the dining room table just to work on this project. I'm considering bailing on all other obligations and seeing just how far I can get. (It's not like I can leave the kids home alone and go run or anything!) My goal for finishing the top has been August 31st of this year. I don't think it's likely that I can do that, but I just noticed that I began the quilt on October 30, 2012. Perhaps I can aim for finishing it by it's 3rd birthday?

I'm linking up with Trish's Inspiration Monday today. Make sure you go over and see what projects everyone else has in the works.

Tuesday, November 13, 2012

Hexagon Organization and Storage

Since I seem to be leading an informal hexagon quiltalong, I thought you might be interested in seeing how I organize my hexes.  Putting them in plastic baggies is too messy, and it hurt my senses to just throw them in a loose pile in a basket. I have shoebox sized rubbermaid boxes for the rainbow quilt when they are sewn together, but what to do with them while they are loose? The pink and gray hexagon quilt won't be sewn into flowers as I go (since it's not flowers!) so I need a way to store them.  A lot of people on the internet use these handy clear boxes both for storage and for work in progress.

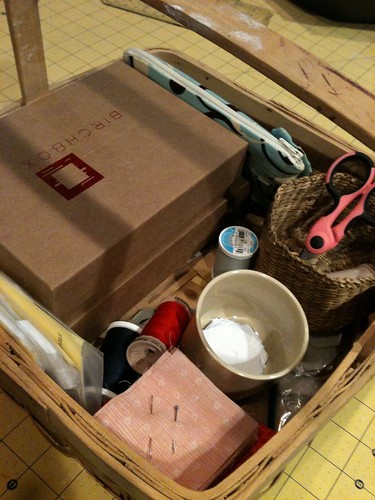
I don't have any of those boxes, and I try really hard not to spend money on stuff that I can make do without.  Since I have more than one hex project going, I need a way to keep them apart as well. If I'm working on hexes at home I use this largish basket to hold all my stuff. It has a little bowl for papers, scissors, thread, needles, and my travel pouch (when it's not traveling.)

Hexagons in progress


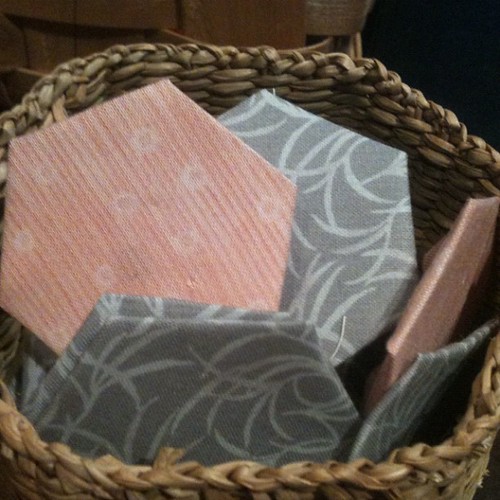
I throw my completed into this little hexagon shaped basket before I iron them.

Anyone else with hexes to show off tonight? #hexchat


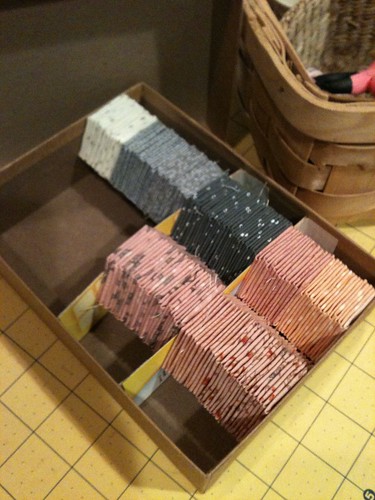
For the completed hexes, I wanted them to be kept neatly contained without purchasing anything. I have been saving the cute little cardboard boxes from Birchbox and they turn out to be the perfect size.  I used the cardboard from a cereal box and carefully cut dividers, and then taped them into place. These work perfectly!

Hexagons in a birchbox
(Fun challenge, how many hexes do you think are in that box? Answer in the comments.)

They are identical on the outside, so I need to find a cute way to designate each one at a glance.  (Yes, I could just write on them, but that's no fun.) The problem is that I am quickly outgrowing my little birchboxes and I'm going to need to find a larger solution. I think this picture is stunning, I wonder where one finds that tray?

Source: lockerz.com via Lisa on Pinterest

There are a lot of different way of storing them, and looking through flickr and pinterest will certainly give you ideas. I'd love to see how you are storing yours, both in progress and as they wait to be combined into a quilt. Feel free to write your own post, or just chat about it on twitter (#hexchat).

If you're new here and are interested in joining the (very very informal!) quiltalong, you can jump in at any time. The tutorial for basting the hexagons can be found here. Our flickr group can be found here. As soon as I have a chance to write it up I'll show you how I join them into flowers (though you can also find this information by googling!)

Sunday, June 02, 2013

The Princess's Bedroom, Before.

I have every intention of living in this house for many years. I may actually never move out of this house. Therefore, even though it's a rental (with the option to buy), I am painting and decorating. The first room I'm going to tackle is The Princess's room, because I've never done a little girl bedroom. I am so excited!  These two pictures from Pinterest are my inspiration, but I have an entire board devoted to her:


(And when I went to get those two pictures, I about died looking at everything I have pinned. So! Cute!)

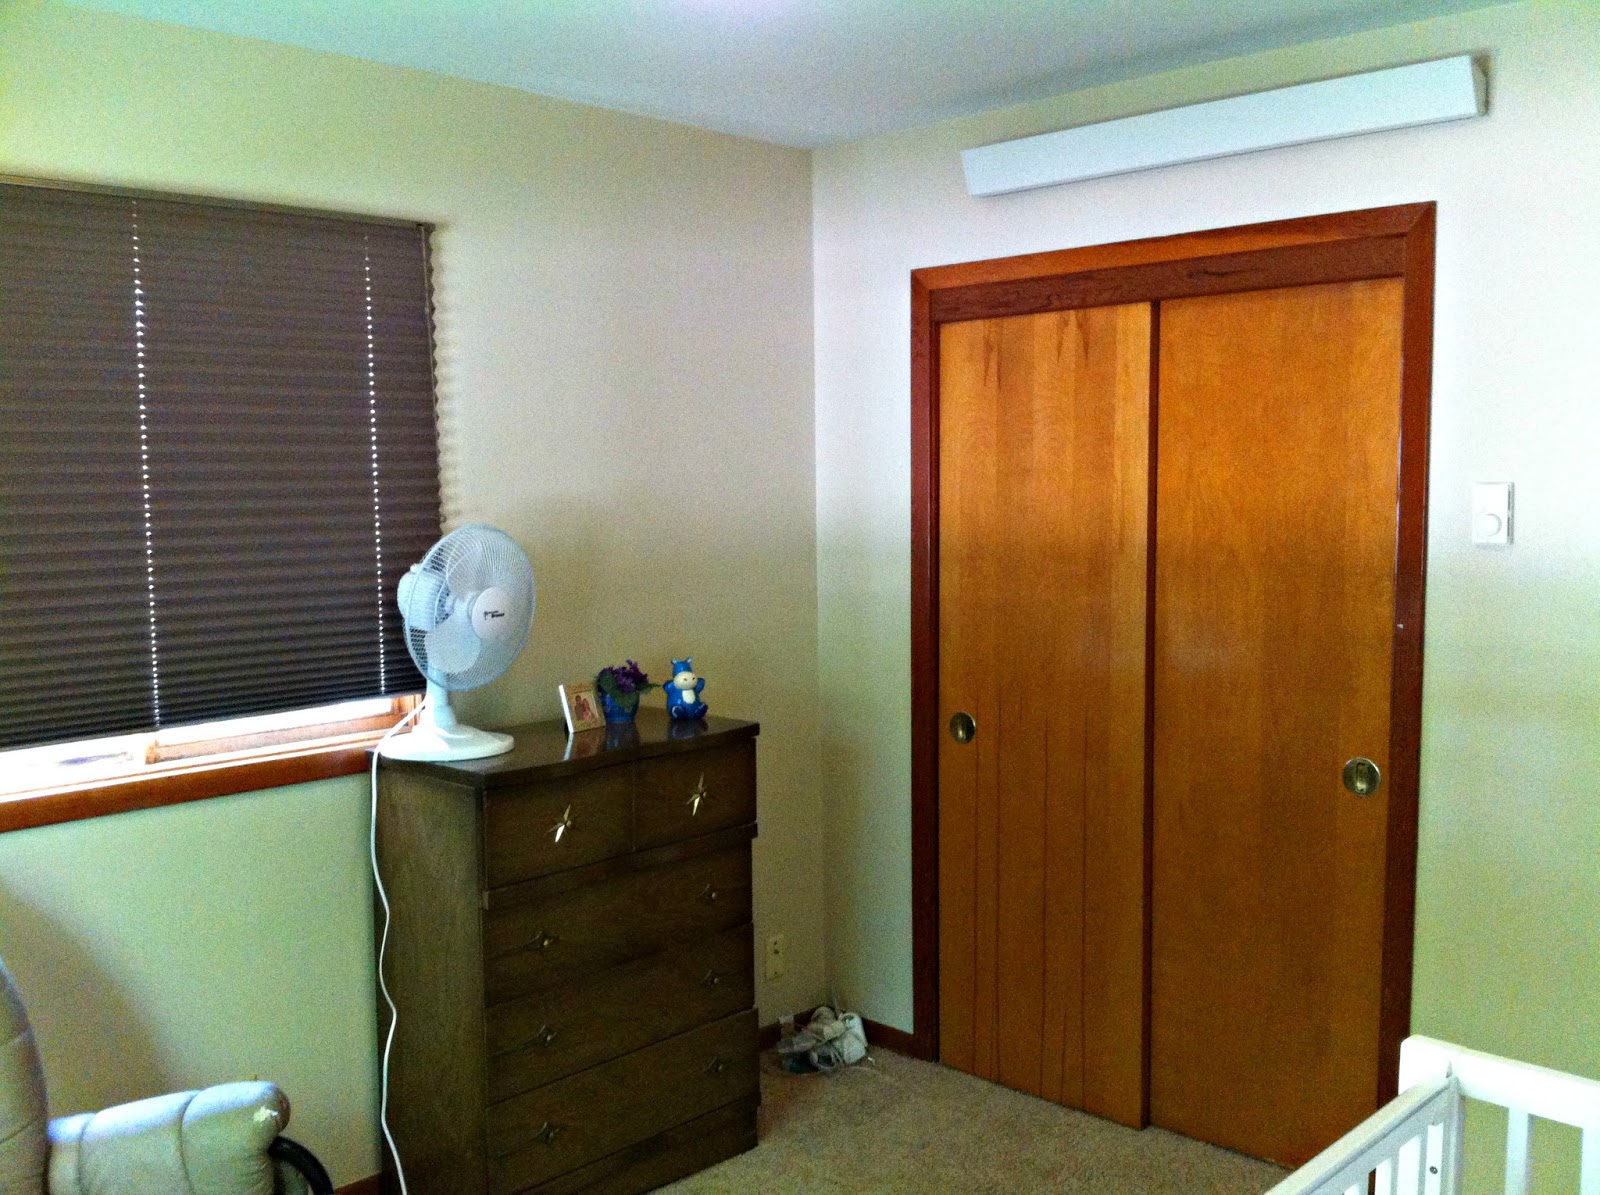
Her room, as it currently is, is a light cream color, but I had planned to paint it gray. The trim in there is wooden tho, so I am wondering if I shouldn't leave it as is.  Here are a couple pictures of the room:

 From the hallway

 From the corner by the closet

 From the corner behind the crib

The crib will convert to a toddler bed and then a full bed, but we are in no hurry as she hasn't shown any signs of being tired of a crib.  I plan to paint the dresser white, and the dresser pulls silver or pewter. I failed to take a picture of them, but they are star shaped, very retro.  I'm having a hard time with the layout of the room as well. The large wall, over the bed, would be best for the display, but you can't really see it from the hallway. Plus, do I want it over the bed? So I am considering moving the bed to be under the window across from the door, or possibly angled in between the windows. Angled won't work when it's a full bed tho, so maybe it would be interesting to fill the space between the windows with the fun stuff?  I just don't know.

I've started to gather some things. I have a blank canvas to do this:


And I'm gathering some pictures and frames and little goodies as well.

 This one is hard to photo, but I have an old ragged hexagon quilt. I am planning to cut out a flower or two and frame them.
 Things I've been saving for her room (Sorry for the sideways picture.)

 A gray and white picture a good friend drew me in high school, and a picture of me from high school.

A page out of a thrifted kid's book of rhymes.

I'd like to do some embroidery hoops and, of course, one day she'll have the pink and gray hexagon quilt. I'm also thinking about a floating wall shelf with some little girly things, for depth and some girly pillows for the glider. Curtains, too, but she'll keep those shades, they are great for blocking light.

What do you guys think? Specifically, about painting the walls gray, and about bed placement?


  © Blogger templates Psi by Ourblogtemplates.com 2008

Back to TOP